Category Archives: Programming

Programming

Developing Multiplatform Game With Libgdx, Part 5: Adding Logic and Basic Player Controls

Getting to game logic and basic controls.

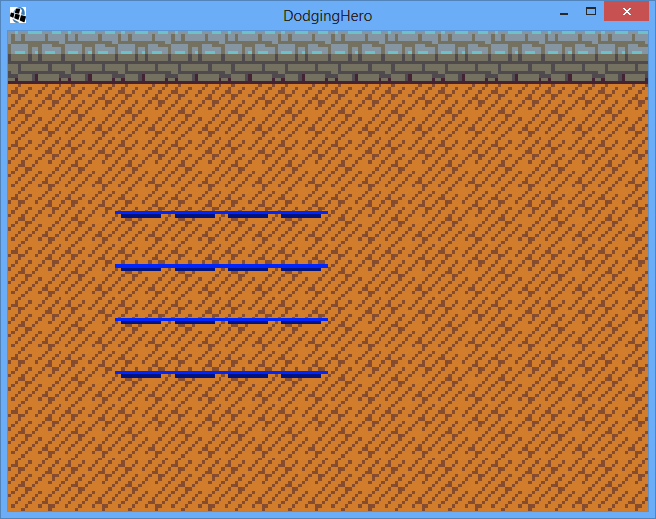
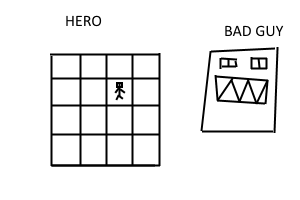
Great. In our previous lesson we’ve made the walkable indicators where player can step in. We’ve also displayed the player sprite. First thing’s first: we remove it now. The teaser is over, boys. We’re back into hardcore programming reality, a no-man’s land of writing game logic.

No, seriously, remove the following line from GameScreen:

batch.draw(game.res.player,
        sizeEvaluator.getBaseScreenX(1),
        sizeEvaluator.getBaseScreenY(1) + 2);

Thanks.

Whenever we develop an application, it’s always a good idea to split logic from graphics. Even if it is much easier to go all-in in one GameScreen class, we don’t want that. The mix of code will make project harder to maintain, but it’s not the only reason. Imagine that you want to pause the game. The game should draw everything properly, only the game objects on the scene stay paused. If you intermix the code, you’re in for lots of extra conditions and workarounds. The rendering part simply should not care about the logics.

Creation of GameLogic and Player classes

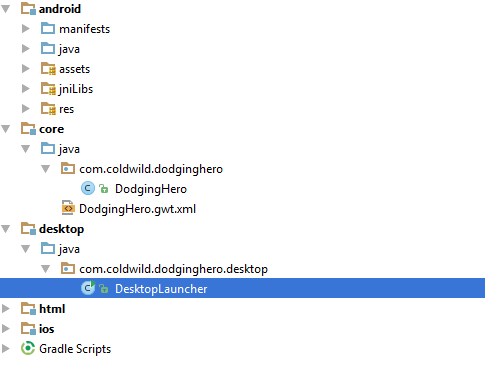
Let’s create a separate package called “logic”. (in my case it is com.coldwild.dodginghero.logic). In this package, create a new class, call it “GameLogic”

Make constructor public. Forget about it for now. Inside our logic package, create another package, called “objects” (in my case it is com.coldwild.dodginghero.logic.objects)

Inside our “objects” package, create a new class, call it “Player”, make it inherit from Sprite class. (public class Player extends Sprite). Declare two variables, fieldX and fieldY, those will indicate. Make a public constructor, that takes two integers, named  fx and fy. Assign them to fieldX and fieldY respectively. This is a field position of your player. Also, introduce getters and setters for fieldX and fieldY values. Final look of player class:

public class Player extends Sprite {
    private int fieldX;
    private int fieldY;

    public Player(int fx, int fy)
    {
        fieldX = fx;
        fieldY = fy;
    }

    public int getFieldX() {
        return fieldX;
    }

    public void setFieldX(int fx) {
        fieldX = fx;
    }

    public int getFieldY() {
        return fieldY;
    }

    public void setFieldY(int fy) {
        fieldY = fy;
    }
}

Now, go to move our constants from GameScreen class

private static final int MAX_BASE_X = 3;
private static final int MAX_BASE_Y = 3;

to GameLogic class and make them public (that you’ll still be able to access from GameScreen). Change all existing references to those constants by adding GameLogic. In front of them (For example, GameLogic.MAX_BASE_X).

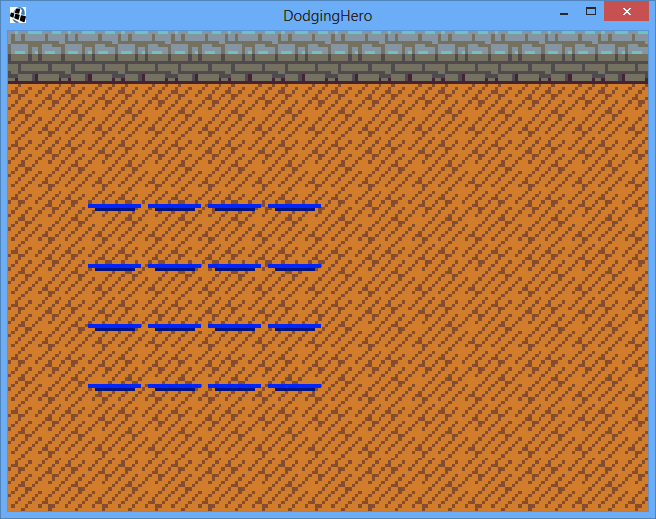
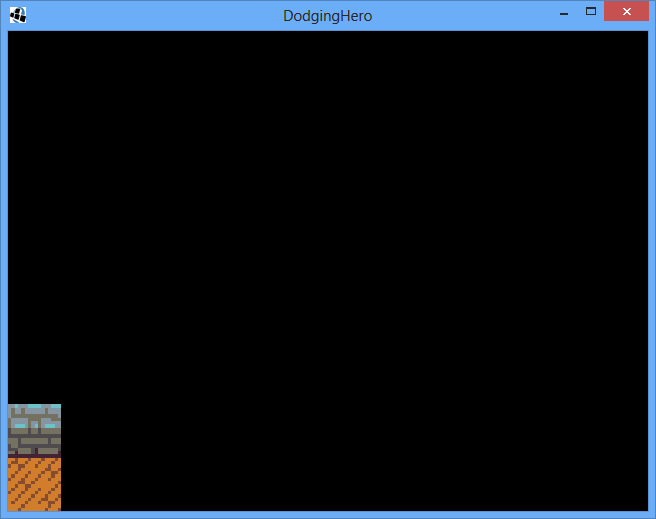
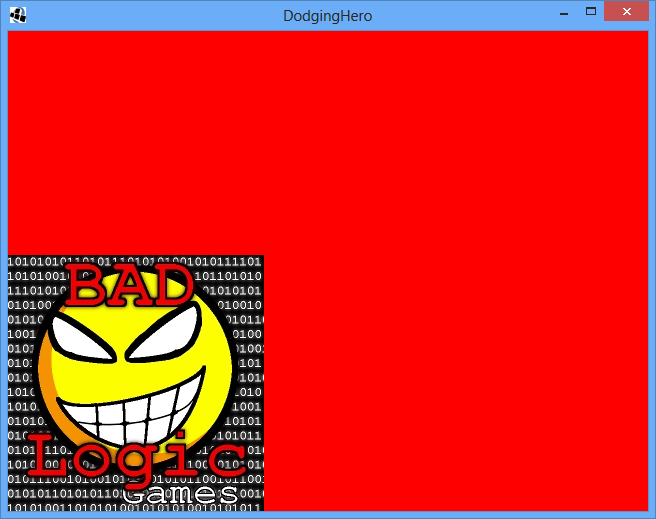
Run the game and make sure everything still works (only you don’t have your hero, because you’ve removed the drawing of his sprite).

Starting to incorporate GameLogic into our GameScreen

Declare GameLogic type variable in our GameScreen class (GameLogic logic;). Initialize it at the end of the GameScreen constructor. Go back to GameLogic and declare Player variable there (Player player), make sure to import it by pressing Alt+Enter. Now here’s where the fun part starts: we’re going to give our player random coordinates at the game start. Inside the GameLogic constructor, initialize our player. player = new Player();

player = new Player(
        MathUtils.random(MAX_BASE_X),
        MathUtils.random(MAX_BASE_Y)
);

Even though the GameLogic is going to make most Player changes, we still need to give access to our GameScreen class, at least for drawing purposes. In our GameLogic class, make a function that returns pointer to the player created:

public Player getPlayer()
{
    return player;
}

Here’s how GameLogic class looks at this point:

public class GameLogic {

    public static final int MAX_BASE_X = 3;
    public static final int MAX_BASE_Y = 3;

    Player player;

    public GameLogic()
    {
        player = new Player(
                MathUtils.random(MAX_BASE_X),
                MathUtils.random(MAX_BASE_Y)
        );
    }

    public Player getPlayer()
    {
        return player;
    }

}

Cool. Now we’ll be able to properly draw it.

Go back to GameScreen. Declare Player variable there (Player player;) assign value to it after our logic has been initialized:

logic = new GameLogic();
player = logic.getPlayer();

Since Player class extends Libgdx class “Sprite”, we’ll be able to draw it quite easily. All we need to do is to assign coordinates and the actual picture that is going to be drawn.

At first, we’ll need to do a small change to Resources class. Change the type of public TextureRegion player; to Sprite (public Sprite player;) Import the necessary class from libgdx (press alt+enter) and then go to Resources constructor and replace player initialization to:

player = new Sprite(gameSprites.findRegion("player"));

Now go back to GameScreen. After our getPlayer function call, add following commands. The next one assigns the picture to player sprite:

player.set(game.res.player);

And then add the next one:

player.setPosition(
        sizeEvaluator.getBaseScreenX(player.getFieldX()),
        sizeEvaluator.getBaseScreenY(player.getFieldY()));

This one was easy: just set the coordinates of our player sprite to actually match the base where the player is standing. Do not get attached to above part of code. It is not a good idea to assign inner class things in the “outside” code. We will move the sprite image and coordinate setting into Player constructor in next lessons, but right now I want to make it easier to understand.

Looks fine, now let’s actually add the drawing call into our GameScreen render() function. After drawBases() call, write: three lines:

batch.begin();
player.draw(batch);
batch.end();

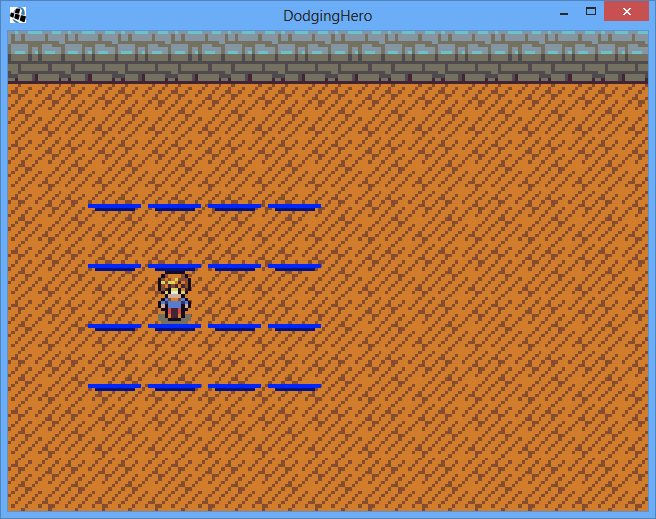
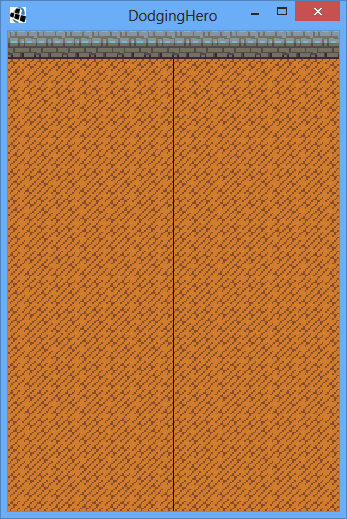
Our familiar batch begind/end calls and an actual call to draw a player. Run the game a few times. You’ll see that player is located on a new position every time. (Which is preeetty cool). But let’s not dwell on our successes! Instead, we should move forward towards new victories. Let’s make that player move! Make our GameScreen implement InputProcessor:

public class GameScreen extends DefaultScreen implements InputProcessor {

Android Studio is going to tell you that some methods are missing. Press Alt-Enter and choose to add the missing ones automatically. The one you’re going to need is KeyDown. But first, we need to tell our game to accept our GameScreen input. To do this, go to GameScreen constructor and add the following line, right at the end:

Gdx.input.setInputProcessor(this);

In our GameScreen’s dispose method, we need to manually say that the game should abandon GameScreen class as input processor. Add the line

Gdx.input.setInputProcessor(null);

at the end of dispose() method.

Now we’ll be able to track key/mousepresses. Our Keydown function (at least on desktop) will be used to issue movement commands to the player. Sure, most simple thing to do now would be to simply set player’s coordinates on keydown (especially since we have the means). But, remember, logic is split from rendering? What if we are going to have animations between moves (meaning that plainly setting coordinates won’t work and we’ll need to play some animations before player moves)?

We’re still going to implement movement in a simplified way that will need refactoring later, but it’s better if we just adjust the players logical field coordinates inside the screen. Time to add functionality to our GameLogic class. We’re going to add public boolean CheckMove(int fx, int fy) function, which will tell us if player can move to the tile or not. The function should check whether new coordinates are legit. For now it’s going to be really simple: return false if coordinates are out of bounds or true otherwise. In the future, we might extend it.

In the end, our function looks like this:

public boolean CheckMove(int fx, int fy)
{
    return (fx >= 0 &&
            fx <= MAX_BASE_X && fy >= 0 &&
            fy <= MAX_BASE_Y);
}

Since each of our comparisons result in a Boolean, we can simply return comparison result instead of using an if/else logical operator.

The next function will actually save the player coordinates. Let’s name it AssignPlayerPosition, it will accept the new coordinates of a player.

public void AssignPlayerPosition(int fx, int fy)
{
    player.setFieldX(fx);
    player.setFieldY(fy);
}


Now let’s go back to our good old GameScreen. In our KeyDown function, let’s add some movehandling code. If we think about it, it does not matter where we move: left,right,bottom,top: the only thing that differs is a coordinate. Therefore, let’s try to move away the move attempts to a separate function. Let’s make a function called AttemptMove, to which we’ll pass the change of coordinates and it will do the rest.

public void AttemptMove(int dx, int dy)
{
    if (logic.CheckMove(player.getFieldX() + dx, player.getFieldY() + dy))
    {
        logic.AssignPlayerPosition(player.getFieldX() + dx, player.getFieldY() + dy);
        player.setPosition(
                sizeEvaluator.getBaseScreenX(player.getFieldX()),
                sizeEvaluator.getBaseScreenY(player.getFieldY()));
    }
}

First, we’re checking whether the new coordinates are legit. If they are, we’re setting a new position of the player on the base. To finalize it, we’re adjusting the position of the player on the screen.

Now we only need to assign proper function calls from our KeyDown function.

@Override
public boolean keyDown(int keycode) {
    switch (keycode)
    {
        case Input.Keys.RIGHT:
            AttemptMove(1, 0);
            break;
        case Input.Keys.LEFT:
            AttemptMove(-1, 0);
            break;
        case Input.Keys.UP:
            AttemptMove(0, 1);
            break;
        case Input.Keys.DOWN:
            AttemptMove(0, -1);
            break;
        default:
            break;
    }

    return false;
}

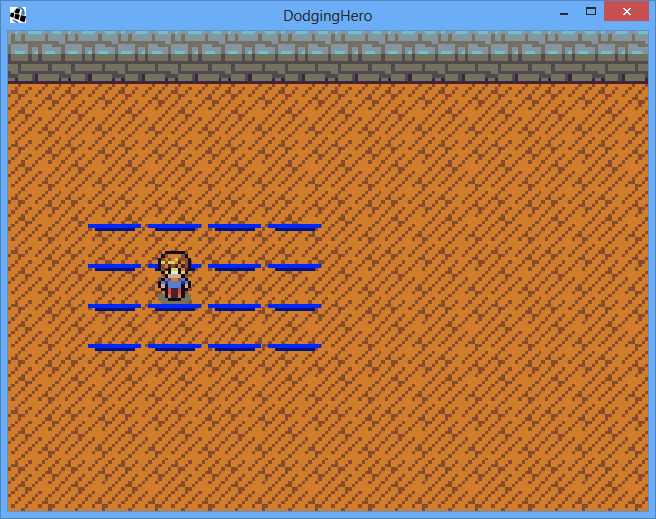
Each direction key moves our character relative to the field coordinates. So if we press the Right key, the character moves by one tile to the right horizontally (dx = 1), and zero tiles vertically (dy = 0). Similar things happen with other directional keys. Run the game and try pressing the keys. Our hero is moving! It could be the end of tutorial, but try resizing our window: the hero is in a bad place (literally). To change this, we need to refresh player’s screen coordinates after every resize. In our gamescreen, find both instances of player.setPosition calls and move them into separate function RefreshPlayer():

public void RefreshPlayer()
{
    player.setPosition(sizeEvaluator.getBaseScreenX(player.getFieldX()),
            sizeEvaluator.getBaseScreenY(player.getFieldY()));
}

Add RefreshPlayer() call to our resize() function (and make sure to replace the existing setPosition calls in GameScreen constructor and AttemptMove to RefreshPlayer() call). Run the program and try resizing the window! Everything should be working now.

That concludes our hero movement tutorial. Next time we’re start implementing the enemy and think of the way to display/handle his attacks! Stay tuned! Vladimir is out.

Relevant commit: https://github.com/vladimirslav/dodginghero/commit/d02228f6ecb39fdbf98bb4ad54e57b5fb8f29b73

Developing Multiplatform Game With Libgdx – part 4 – Game Field & Hero Placement

Preparing Assets

So, we have the background, maybe now it’s the time to get to the elements in the front. We’ll try to display a walkable tiles (4×4), and a player.

Since there’s really no way to indicate the walkable tiles, let’s draw a simple „base” first.  Make a small picture 16×2 and draw something like a base where character can stand at. Here’s mine (I’m really not an artist):

base

This will indicate where player can move. Save it as base.png. One thing that I’ve learned as I started to develop games is that this type of bases should never be as big as the character. Since our characters are 16×16, it might seem like a good idea to make the base as the square (which will be drawn around our character). Nothing can be further from the truth! If we do this – the characters will look ‘caged’ in the tiles which makes the game look bad.

As for the player, we pick one from the same tileset by Lanea Zimmerman (http://opengameart.org/content/tiny-16-basic). Just open up characters.png and cut out 16×16 tile with any character you like. Here’s mine:

player

Cool. Save it as player.png.

Let’s add those resources in our Resources class.  Similar to our ground and wall declarations, let’s declare two more TextureRegions: player and base.

public TextureRegion player;
public TextureRegion base;

Load them the same way you loaded wall and ground.

player = gameSprites.findRegion("player");
base = gameSprites.findRegion("base");

Ok, we’re done here. But before we proceed to actual drawing, we need to determine WHERE to draw them, right?

Programming The Coordinates

Again, we need to position those things in a good way. The way I approach it is that I usually create some sort of SizeEvaluator class which calculates the stage width and gets me the relative positions of the elements on the stage. Let’s get to programming! In our graph package, add a new class. Name it SizeEvaluator. This will actually calculate where we should place our hero / enemy / tile bases.

Add the private variable Stage measuredStage; this one will be pointing towards the current game stage. Also, add the private variable Resources which will be pointing, you’ve guessed it correctly, to the game resources.

The SizeEvaluator will also contain the max X and max Y the base tile can have. We have 4×4 field, so x and y will limit to 3 [0..3]. Similar to the screen coordinates, X will go from left to right (0 being the leftmost, 3 being the rightmost) and Y go from bottom to top (0 at the bottom, 3 at the top).

The SizeEvaluator constructor is going to accept a stage as parameter and assign the value to measuredStage. The same with resources: we’ll need them to get the tile sizes in order to properly calculate the distances. We’ll also need to pass max base x and max base y to it.

This is how it should look at first:

public class SizeEvaluator {

    Stage measuredStage;
    Resources resources;

    private final int maxTileBaseX;
    private final int maxTileBaseY;

    public SizeEvaluator(Stage _stage,
                         Resources _resources,
                         int _maxTileBaseX,
                         int _maxTileBaseY)
    {
        measuredStage = _stage;
        resources = _resources;

        maxTileBaseX = _maxTileBaseX;
        maxTileBaseY = _maxTileBaseY;
    }

}


It still does nothing. Let’s fix it! We’ll write the function which will give back the tile coordinates. We’ve talked that our hero (and the walkable tiles) are going to be located on the left. That means that we can simply take the width of the stage, split it into two then add some margin and take the position of the base into account.

We’ll implement the public function getBaseScreenX(int baseX) and getBaseScreenY(int baseY). It will take the x and y coordinates of the base (x and y can range from 0 to 3 included) and return their position on the screen.

The first implementation of functions is going to look like this:

public float getBaseScreenX(int baseX)
{
    return measuredStage.getWidth() / 2 - resources.TILE_SIZE * (1 + 
maxTileBaseX - baseX);
}

Quite simple: as we discussed before, we split the stage width by two (getting the coordinates of the middle), then we substract as tile widths to get to our necessary base x. (i.e. if we pass 0 as base X, we’ll take middle of our scene (call it midX) and substract (4 – 0) * 16 from it, getting the leftmost base tile coordinate).


We’re adding 1 to maxTileBase coordinate in order to handle the max case effectively. If we would not do it, the tile would be drawn over the middle (you can experiment and see what happens if you take away “1 +” part from the equation).

public float getBaseScreenY(int baseY)
{
    return measuredStage.getHeight() / 2 - resources.TILE_SIZE * ((maxTileBaseY + 1) / 2 - baseY);
}

getBaseScreenY looks a bit different. We want to center it vertically (equal amounts of tiles on top and bottom): to do that, we take the vertical middle of the scene and substract the half of total possible base field height (we have 4 bases with 16 sized tiles), so we substract 32 right now.


Adding SizeEvaluator to our Game Screen

Time to implement it now! In our GameScreen, declare a private variable SizeEvaluator sizeEvaluator; Declare constants MAX_BASE_X and MAX_BASE_Y, that we’re going to pass to our SizeEvaluator.

private static final int MAX_BASE_X = 3;
private static final int MAX_BASE_Y = 3;

Initialize the SizeEvaluator in GameScreen constructor (right at the end of it, after we’ve already initialized gameStage). Here’s how my GameScreen constructor looks now, see final line:

public GameScreen(DodgingHero _game) {
    super(_game);
    batch = new SpriteBatch();
    bg = new Background();

    ExtendViewport viewp = new ExtendViewport(STAGE_W, STAGE_H); 
    gameStage = new Stage(viewp, batch);
    sizeEvaluator = new SizeEvaluator(gameStage, game.res, MAX_BASE_X, MAX_BASE_Y);
}

Now we can proceed to drawing the bases. Let’s add function drawBases(), right here, in GameScreen class:

private void drawBases()
{
    batch.begin();
    for (int x = 0; x <= MAX_BASE_X; x++)
    {
        for (int y = 0; y <= MAX_BASE_Y; y++)
        {
            batch.draw(game.res.base,
                    sizeEvaluator.getBaseScreenX(x),
                    sizeEvaluator.getBaseScreenY(y));
        }
    }
    batch.end();
}

Before every drawing, we start our batch batch.begin(). After we are done drawing everything, we call batch.end(). We’ll go through our cycle and draw MAX_BASE_X + 1 columns, each containing MAX_BASE_Y +1 elements. (4×4, like we’ve planned).

Add the drawBases call in our render function, right after we call bg.draw:

bg.draw(gameStage, game.res);
drawBases();

Run the game and see what happens.

Tiles, first version

Tiles, first version

Well, we got some results, right? But it does feel somewhat off. Firstly, the bases are too tightly put together. Let’s add some margin before them.

Get back to our SizeEvaluator class and implement a new int constant: BASE_MARGIN, which will be equal to 2 (pick any number you like, but be reasonable: it’s the distance between bases).

private final int BASE_MARGIN = 2;


Now add this to getBaseScreenX and getBaseScreenY equations. We want it to affect the distance between every tile, that’s why we’re putting it in the TILE_SIZE part (which essentially means the distance between tiles).

public float getBaseScreenX(int baseX)
{
    return measuredStage.getWidth() / 2 - (resources.TILE_SIZE + BASE_MARGIN)
            * (1 + maxTileBaseX - baseX);
}

Now do the same with getBaseScreenY:

public float getBaseScreenY(int baseY)
{
    return measuredStage.getHeight() / 2 - (resources.TILE_SIZE + BASE_MARGIN)
            * ((maxTileBaseY + 1) / 2 - baseY);
}


Run the game again.

Tiles, distanced

Tiles, distanced

Looks much better! We can clearly distinguish the separate walkable bases. Let’s just draw the player somewhere. We’re actually going to rework that part, but I want us to feel good about ourselves. Time for instant gratification!

In our drawBases function, right before batch.end() call, add the following line:

batch.draw(game.res.player,
        sizeEvaluator.getBaseScreenX(1),
        sizeEvaluator.getBaseScreenY(1) + 2);


Run the game.

tiles_v3

Oh no! The dreaded ‘cage’ effect, our player looks stuck between tiles. Obviously, this distance won’t do. Let’s reduce the distance between bases by 1/3. Rewrite getBaseScreenY function:

public float getBaseScreenY(int baseY)
{
    return measuredStage.getHeight() / 2
            - ((resources.TILE_SIZE * 2) / 3 + BASE_MARGIN)
            * ((maxTileBaseY + 1) / 2 - baseY);
}

basically, we’re multiplying TILE_SIZE by two thirds, essentially reducing the distance by 66%. Save the code and run it now.

tiles_v4

It does look better, looks more like our hero is standing on one of the bases instead of being stuck between two levels.

Good job, now you have a solid tiles positioning. In the next lesson, I’ll actually address the player movement.

Relevant git commit: https://github.com/vladimirslav/dodginghero/commit/3de79268966817849163eecbc538ba804fa7afd1

Developing Multiplatform Game With Libgdx – part 3 – tile background

Going Further: Background Implementation

So, Vladimir, are we finally ready to actually do something now? Damn right we are! In this lesson, let’s make a background and give our game the pixel-artsy feel. Go to our new amazing GameScreen, and add a new declaration at the start of the class:

private Stage gameStage;

In Libgdx, The stage is used to position UI elements in a nice way and read incoming UI events. It makes our job much easier.

We will initialize it with a new ViewPort. ViewPort limits the area of the screen which we are able to see. Since our game will be run on multiple devices with different screens, we need to make sure that every player will be able to play it, no matter his screen size. Libgdx offers lots of different viewports (you can read more about it here: https://github.com/libgdx/libgdx/wiki/Viewports). We’re going to use FixViewport, this will allows us to make sure that width/height proportions are kept, the main characters are going to be drawn in the middle and the background (which will be made from tiles) is going to be extended depending on the actual size of the screen.

First, let’s introduce a constant values for game width and height (these will be the minimal field width / height and will be extended according to window proportions). Since our tiles are really small, I’m choosing 192 for width and 128 for height (basically, 192 / 16 = 12 tile width, 128 / 16 = 8 tile height.).

public final int STAGE_W = 192;
public final int STAGE_H = 128;

Then, in our GameStage contructor, let’s initialize our gameStage, by passing our spriteBatch and new Viewport as parameters.

The whole part of code will look like this now:

public final int STAGE_W = 192;
public final int STAGE_H = 128;

public GameScreen(DodgingHero _game) {
    super(_game);
    batch = new SpriteBatch();

    ExtendViewport viewp = new ExtendViewport(STAGE_W, STAGE_H);
    gameStage = new Stage(viewp, batch);
}


Basically, we tell our gameStage to use our new extendviewport and to scale the screen accordingly. No matter the window size, the coordinates on the screen are always going to be at least STAGE_W x STAGE_H (192×128 in this case).

Splitting game update logics from drawing

Now, let’s split the screen update part from the actual drawing part. Make a new function update:

private void update(float delta)
{
    gameStage.act(delta);
}

The function updates the contents of the stage. We don’t really have any right now, but it will be useful later on. Delta is the time that passed since the rendering of the previous frame. If our stage has any animations, it basically adjusts them accordingly.

Now, let’s add a call of our update function inside the render function. After the screen is cleared (glClear command), issue a draw command to our stage. It will apply the stages camera settings and our further drawing will be done in the coordinates system we requested during constructor call.

Change the values in glClearColor to 0, 0, 0, 1 (Red, Green, Blue, Alpha). This will set the clear color to black, away from annoying red.

@Override
public void render (float delta) {
    update(delta);

    Gdx.gl.glClearColor(0, 0, 0, 1);
    Gdx.gl.glClear(GL20.GL_COLOR_BUFFER_BIT);

    gameStage.draw();

    gameStage.getBatch().begin();
    gameStage.getBatch().draw(game.res.ground, 0, 0);
    gameStage.getBatch().draw(game.res.wall, 0, 16);
    gameStage.getBatch().end();
}

Finally, in dispose() function, call gameStage.dispose(). The gameStage takes up resources that needs to be manually disposed of when we exit our game. Add super.dispose() call, which is a call to parent’s (DefaultScreen) dispose method (nothing’s there yet, but it’s a good idea to do it nonetheless in case we change something in the future).

@Override
public void dispose()
{
    super.dispose();
    gameStage.dispose();
    batch.dispose();
}

Run the game. You should see something like this:

How Tiles Look At First

How Tiles Look At First

As you see, the tiles have increased in size! However, if you try resizing the window, the image stretches uncomfortably.

Uncomfortable Resize

Uncomfortable Resize

This is because our viewport is not being updated. In GameScreen, add resize function:

@Override
public void resize(int w, int h) {
    super.resize(w, h);
    gameStage.getViewport().update(w, h, true);
}

This one is called on every resize, effectively resizing our viewport on every change of window size.

Proper Resize

Proper Resize

The image is smaller, but dimensions are at least kept (and not stretched).

Filling the background with tiles

Finally, let us get to the background. In our main game package, create a new one called “graph” In my case, it is com.coldwild.dodginghero.graph

Inside that package, create a new Java Class, named “Background.” Create an empty public constructor (we’ll need it in later lessons).

Then, get to the drawing function. The current goal is quite simple: make a floor background with a wall behind. Let’s introduce the draw method, which will draw the background on the given Stage using Resource pack that we’ve loaded.

public void draw(Stage stage, Resources res){}

Make sure to include the proper stage package (alt+enter when your cursor is on Stage, then select the Stage from libgdx).

The current background idea is simple: fill the top row of the screen with wall tiles and the other parts with floor tiles. We’ll need two for cycles for that. One that goes from top to bottom and the other one inside it that goes from left side to right side. But first, go to Resources and introduce new constant TILE_SIZE (which, obviously, indicates our file size). We will use it for background drawing.

Get back to Background class file. Let’s raw the ground first, and then we’re going to worry about the walls.

public void draw(Stage stage, Resources res)
{
    stage.getBatch().begin();

    for (int y = (int)stage.getHeight(); y >= -Resources.TILE_SIZE; y -= Resources.TILE_SIZE)
    {
        for (int x = 0; x < stage.getWidth(); x += Resources.TILE_SIZE)
        {
            stage.getBatch().draw(res.ground,
                    x, y,
                    0, 0,
                    Resources.TILE_SIZE, Resources.TILE_SIZE,
                    1.01f, 1.01f,
                    0);
        }
    }
    stage.getBatch().end();
}

We’re going from the height of the stage (stage.getHeight) to the lower border and filling every row with tiles. Hold on a second, why are we using such a complicated draw procedure? We’re doing it because otherwise the images will experience tearing on stage resize. (If you figure out a better way – let me know, seriously).

Uncool black lines (poor resize result)

Uncool black lines (poor resize result)

Now, let’s add the Background declaration and initialization to our GameScreen. Add the line    Background bg; near the other declarations. In GameScreen constructor, add bg initialization:

bg = new Background();


And finally, we must make a call to bg.draw during our rendering. Add it before gameStage.draw() call. bg.draw(gameStage, game.res);

Run the game. The screen should be filled with floor tiles now. The only thing left now is to add wall tiles.

Right before stage.getBatch().end();, add another for cycle:

for (int x = 0; x < stage.getWidth(); x += Resources.TILE_SIZE)
{
    stage.getBatch().draw(res.wall, x, stage.getHeight() - Resources.TILE_SIZE, 0, 0, Resources.TILE_SIZE, Resources.TILE_SIZE, 1.01f, 1.01f, 0);
}


Run the game, see the background that stretches and handles any screen size well. Congratulations! Your background is complete.

Git Commit with code changes from this lesson: https://github.com/vladimirslav/dodginghero/commit/b15fa65097d8d1366955000e3b9dac594a6085cc

More on viewports:
https://github.com/libgdx/libgdx/wiki/Viewports

Developing Multiplatform Game With Libgdx – part 2 – project structure

Heya! The next lesson adresses the project structure and introduces asset packing. The video turned out to be a bit confusing, but the extended transcript is below. Let me know if you have any questions!

What is a game and how we build it

If we think about it, what is a game? Let’s check out the main file, DodgingHero. If we really dumb it down, the game is a cycle of displaying info and getting user’s feedback. The game screen actually renews many times per second (FPS, frames per second, actually indicate this exact value). The render() function in Libgdx is doing exactly this. It cleans the screen (glClear command), then it draws our own things.

The create() function initializes our game. Those are the operations that need to be done once. Mainly, it’s resource allocation. We need to load the textures/sprites only once (the line img = new Texture(“badlogic.jpg”); does exactly that). We also initialize SpriteBatch (batch = new SpriteBatch();), essentially this is the structure that sends the commands to our graphic card.

On the opposite side, we have dispose() function, that is called after our game is done running. We need to free up resources. And this is exactly happens in this particular case: both batch and img are being disposed.

Now that we have a very general idea what’s going on, I’m going to tell you how I usually structure my projects. A good project structure ensures that project maintenance and code updates will go much smoother. As they say, “hours of planning can save you weeks of programming.”

Preparing our art

First thing first, let’s find some art for our prototype. I usually use opengameart if I want to build something fast, and this case will be no exception. After some search, I found http://opengameart.org/content/tiny-16-basic – tileset with some monsters and humans which we can use for our game prototype. I’m going to pick the tiles they have, pick two of them and will use them to show our initial background, repeated the tiles for the background. Essentially I’m doing some extra work here (because the tilesets on the link are already very neatly organized), but I need to show you what’s going on by an example.

In our project root folder (the same folder where we have “android”, “core”, “html” … folders) , let’s make a folder named “assets.” Inside that folder, make another folder, named “unpacked.” From the tileset, cut out one floor and one wall tile (I usually use paint.net, http://www.getpaint.net/index.html for that purpose, but the simple ‘paint’ will do for now).Each image should be 16×16 pixels in size, save them as ground.png and wall.png accordingly. Now, we have two tile sprites, but what do we do with them? For a better performance, all sprites should be put into spritesheets. (It takes time for the graphic card to switch between textures/sprites). It’s really not a problem for modern computers most of the time (for a small game), but I’d rather teach you to do things the ‘proper’ way first. In our Android Studio, go to desktop package and open DesktopLauncher. For Desktop version, we’re going to add texture packing. (Whenever we run desktop version, the sprites are going to be packed into one file. We’ll be able to use this this pre-generated file in the other platforms, like android). The main reason I’m doing it this way is because TexturePacker is not supported by some of our platforms (at least HTML), so I’d rather execute it on Desktop only.

In DesktopLauncher class, add the following private function:

static void Pack()
{
      TexturePacker.Settings settings = new TexturePacker.Settings();
      settings.maxHeight = 2048;
      settings.maxWidth = 2048;
      settings.pot = true;
      TexturePacker.process(settings, "../../assets/unpacked", "packed", "game");
}

Then, right at the start of main() function, add the call to Pack() function, it will look like this now:

public static void main (String[] arg) {
   Pack();
   LwjglApplicationConfiguration config = new LwjglApplicationConfiguration();
   new LwjglApplication(new DodgingHero(), config);
}

Loading the art

Select the DesktopLauncher configuration and run our program on it (first launch might take some time). Now go and check the android\assets\ folder. There should be a new directory, “packed” there. Inside that directory, there should be two files: game.png and game.atlas. First one is the picture of two tiles put together. The other one is actually a text file (you can check it out with any text editor, I use Notepad++). It is, like extensions says, an atlas, that describes different sprites in it and coordinates of those sprites in our new big picture.

Now we’ll have to load this atlas. The next thing we do, make a resource class, which will hold the graphical data. Make it in the same package as your main game class. In my case, I right click on “com.coldwild.dodginghero”, choose “New” and pick “Java Class.”

create-new

New Class Creation

Name it “Resources.” This one will be responsible for loading and storing the assets for our game. Go to your new file, and inside Resources class declare the public constructor and TextureAtlas variable gameSprites.

public class Resources {

    TextureAtlas gameSprites;

    public TextureRegion ground;
    public TextureRegion wall;

    public Resources()
    {
        gameSprites = new TextureAtlas(Gdx.files.internal("packed/game.atlas"));
        ground = gameSprites.findRegion("ground");
        wall = gameSprites.findRegion("wall");
    }

    public void dispose()
    {
        gameSprites.dispose();
    }
}

Before constructor declaration, we declare TextureAtlas named “gameSprites”– this is the thing that is going to store our spritesheet  with game characters and background.

dispose() function will be called after the end of our program, to unload all resources that have been used.

We put the initialization of the gameSprites into our constructor with the following line:

    gameSprites = new TextureAtlas(Gdx.files.internal("packed/game.atlas"));

This will take the generated atlas from ourproject/android/assets/packed/ folder. After that, declare two TextureRegion variables, ground and wall right after gameSprites atlas.

TextureAtlas gameSprites;

public TextureRegion ground;
public TextureRegion wall;


Great, now let’s assign some values in our constructor. It’s not hard: just add the following lines:

ground = gameSprites.findRegion("ground");
 wall = gameSprites.findRegion("wall");


The final result should look like this:

public class Resources {
 
     TextureAtlas gameSprites;
 
     public TextureRegion ground;
     public TextureRegion wall;
 
     public Resources()
     {
         gameSprites = new TextureAtlas(Gdx.files.internal("packed/game.atlas"));
         ground = gameSprites.findRegion("ground");
         wall = gameSprites.findRegion("wall");
     }
 
     public void dispose()
     {
         gameSprites.dispose();
     }
 }


Testing what we have

Now ground and wall point to the specific tiles and we’re be able to draw them! Now go to your main class file (in my case it’s DodgingHero.java) in core folder and add new public variable, Resources right at the start of the file. You should initialize it at the start of create() function. Remove the “img” variable and all code related to it from the file. You won’t need it anymore. Let’s just test if we can draw our simple tiles. In dispose function, add res.dispose(); Final result should look like this:

  
 public class DodgingHero extends ApplicationAdapter {
     public Resources res;
     SpriteBatch batch;
 
     @Override
     public void create () {
         res = new Resources();
         batch = new SpriteBatch();
     }
 
     @Override
     public void render () {
         Gdx.gl.glClearColor(1, 0, 0, 1);
         Gdx.gl.glClear(GL20.GL_COLOR_BUFFER_BIT);
         batch.begin();
         batch.end();
     }
 
     @Override
     public void dispose () {
         batch.dispose();
     }
 }

Now, for the sake of testing our tiles, let’s add simple drawing between batch.begin() and batch.end() inside our render() function:

@Override
 public void render () {
     Gdx.gl.glClearColor(1, 0, 0, 1);
     Gdx.gl.glClear(GL20.GL_COLOR_BUFFER_BIT);
     batch.begin();
     batch.draw(res.ground, 0, 0);
     batch.draw(res.wall, 0, 16);
     batch.end();
 }

This way we should draw the wall above the ground. The first parameter is the sprite that we want to draw, the next is the coordinates(x, y). Unless you change something, the x coordinates are going from left side of the screen to right side (0->width) and y is going from bottom to top (0->height). 0 means the lowest point of the window. Run the program and you should see both small tiles drawn at the left side of the screen:

gamescreen

Our work in progress!

Adjusting Code Structure

So, Vladimir, are we ready to build the game right here? Hell no. It might seem like a good idea to write all code here, but it will quickly become bloated if nothing is done: imagine that we have to program all the menus and screens in one file. The way I usually do it is to split every separate screen into a separate file and do the rendering/control checking there. The good news is that libgdx allows you to do this quite easily.

In our core/java/com.yourname.gamename package, create a new package called “screens.” There, we’ll add the DefaultScreen parent class, which will store the link to our game object (and will be able to access our resources from there), from which we’ll inherit the next screens.

newpkg

New Package Creation

Right click on the “screens”, package select “new” -> “Java Class.” Name it DefaultScreen, make it implement Screen (public class DefaultScreen implements Screen), add the necessary import from Libgdx by placing map cursor over “Screen” and pressing alt+enter. Press alt-enter again to automatically implement the missing methods. Don’t touch them. (for now). Now, we’ll do two things:

  • Declare a variable of our main class (it will point out to game)
  • Create a constructor for DefaultScreen

That should not take much time:

public class DefaultScreen implements Screen {
 
     public DodgingHero game;
 
     public DefaultScreen(DodgingHero _game)
     {
         game = _game;
     }


Very good, our DefaultScreen class is ready.

Now we should implement the actual game screen. Right click on screens package, add new Java Class, let’s name it GameScreen. GameScreen should extend the Default Screen. (public class GameScreen extends DefaultScreen). Press alt+enter to implement the default constructor. Your class should look like this:

public class GameScreen extends DefaultScreen {
     public GameScreen(DodgingHero _game) {
         super(_game);
     }
 }


Now go to your main class (in my case it’s DodgingHero), and blatantly cut-paste render() function from there to GameScreen. Change the input parameters to accept float delta (public void render (float delta)). We now have this:


public class GameScreen extends DefaultScreen {
     public GameScreen(DodgingHero _game) {
         super(_game);
     }
 
     @Override
     public void render (float delta) {
         Gdx.gl.glClearColor(1, 0, 0, 1);
         Gdx.gl.glClear(GL20.GL_COLOR_BUFFER_BIT);
         batch.begin();
         batch.draw(res.ground, 0, 0);
         batch.draw(res.wall, 0, 16);
         batch.end();
     }
 }

batch is unresolvable. We need to move it from main class here. Main class should be very small now:

 public class DodgingHero extends ApplicationAdapter {
     public Resources res;
 
     @Override
     public void create () {
         res = new Resources();
     }
 
     @Override
     public void dispose () {
         res.dispose();
     }
 }


The last thing to do is to change batch.draw calls. We don’t have res variable here, but we can access it via our game variable. Change batch.draw(res.ground, 0, 0); to batch.draw(game.res.ground, 0, 0); Do the same change with wall. The final GameScreen class should look like this:

public class GameScreen extends DefaultScreen {
 
     SpriteBatch batch;
 
     public GameScreen(DodgingHero _game) {
         super(_game);
         batch = new SpriteBatch();
     }
 
     @Override
     public void render (float delta) {
         Gdx.gl.glClearColor(1, 0, 0, 1);
         Gdx.gl.glClear(GL20.GL_COLOR_BUFFER_BIT);
         batch.begin();
         batch.draw(game.res.ground, 0, 0);
         batch.draw(game.res.wall, 0, 16);
         batch.end();
     }
 
     @Override
     public void dispose()
     {
         batch.dispose();
     }
 }

Run the game now. Oh no! What do we have in front of us? It’s a black screen! Something went wrong. No worries, the issue is that we moved the code to the separate screen, but did not instantiate it in any way. We need to tell our game to explicitly switch to it. Go back to our main class, and do two things:

  • Change class declaration: public class DodgingHero extends ApplicationAdapter { should change to public class DodgingHero extends Game {
  • At the end of create() function add the following line: setScreen(new GameScreen(this)); Press alt+enter to resolve and auto-import GameScreen class

Run the game now. You should see the red screen with two tiles at the bottom. It might not look as much, but our project has changed a lot. After this, we’ll be able to independently work on specific screens, and adding new screens (like main menu, credits, etc) won’t be a problem.


Git Commit: https://github.com/vladimirslav/dodginghero/commit/d02228f6ecb39fdbf98bb4ad54e57b5fb8f29b73

I’ve taken assets from: http://opengameart.org/content/tiny-16-basic, they are made by Lanea Zimmerman. I’ve cut separate tiles so it would be easier to follow (see my git repo).

You might want to check https://libgdx.badlogicgames.com/documentation.html for more details and in-depth descriptions.

Developing Multiplatform Game With Libgdx – part 1

Hey everyone!
After learning things from different tutorials on Internet, I wanted to contribute something. There are lots of tutorials on how to make games. I want to make a tutorial that would go through the whole process: from setting up the work environment to game publishing.

Here’s the video of the project, but in case you’re more into reading, the transcript is given below.

Setting up our project

I’ll be making a multiplatform game that you will be able to run on PC, but my end goal is to publish it on Android. You don’t really need the Android device to follow this tutorial: I’ll explain how to make the game run on your desktop machine, without the need to launch it on Android.

The game idea is simple: on half of the screen, we have a 4×4 field and a character that moves between tiles to dodge enemy attacks. On the right side, there’s an enemy (or group of enemies) that stand and attack the hero (or, rather, some of the tiles).

Game Idea

Game Idea

If anyone promises to make you a gamedev expert simply from doing one tutorial – he’s probably lying. In this tutorial, the end goal is to make a game, but it’s up to you, my reader, to continue perfecting your skills. To me, game programming is a matter of curiosity and experimenting. You’ll have the initial base, but it’s up to you to try new things and experiment by trying out new ideas in the way you want to.

Requirements (In order of installation):

Here’s more info on preparing the environment in case you’re struggling with something: Link to Libgdx Article

Extra tools I’m using:

  • Git Client (For Source control), I’m using the command tools, but you can GUI at https://desktop.github.com/
  • Far Manager (For easier file managing + command line tools), get it for free at http://www.farmanager.com/ If you don’t want to use it, simply use windows explorer + command prompt

Creating Version Control Repository

You can skip this step if you want to, but I strongly advise you to store your code somewhere. Version control, like git/svn/mercurial is a perfect way to do this. Since this is a public project (you will be able to see my code), I will use github to create a project. If you want to focus on private projects, you can use mercurial (hg) or git, in combination with http://bitbucket.org, which provides free storage for your code soruce control.

First, create a new project (repository). Then, pull it to your machine. With git, I use the following command:

git clone http://linktomyrepo

With hg, it’s something similar:

hg clone http://linktomyrepo

Setting Up The Game Project Itself

After you install JDK8 and Android Studio, it’s time to launch Libgdx Setup App.

Gdx Project Setup Screen

Gdx Project Setup Screen

You can name the project however you want to. I’ll name mine Dodging Hero. The package name should be somewhat descriptive. The usual format is com.yourname.gamename, in my case (Since I’m the owner of coldwild games studio), I’m going to name it com.coldwild.dodginghero.

The game class is where the initial setup and high-level launch things happen. The name should not contain spaces.

The destination is up to you, if you are using source control, just pick the folder where you’ve checked out the Git repository. Try not to have destinations with spaces though. Might save you for potential issues later on. Android SDK is the folder of your android software development kit. It should have been installed with Android Studio. In my case the folder is G:\android

In sub Projects, you generally pick the Platforms that you want to support. This will probably require extra work, but we’re not here to rest. Mark “Desktop”, “Android”, “Ios”, “Html”

Extensions are the helping tools/code snippets and libraries that can make development much easier. Put the checkboxes under following options: “Freetype”, “Tools”, “Controllers”. Uncheck everything else. If you hover the mouse buttons on checkboxes, you are told what every tool means, feel free to read up on the other ones on internet and use them wisely when developing your next games.

To explain a bit more of our choices: “Freetype” – this is the font generation, OpenGL (which is basically behind libgdx) cannot simply display True Type Fonts (.ttf) that are used in our operating systems, so we’ll need to generate the images that contain letters in order to. “Tools” are various supporting functions, in our case we’ll need Texture Packer that comes with them. It will allow us to pack all of our smaller images into one big image, which can be faster process by graphic cards. “Controllers” is the controller/joystick support, I think it will be nice if we add it for our desktop if we have time.

Finally, press “Generate.” You might get a warning telling you that android build tools version is newer. Don’t mind it, confirm the build. After that, you’ll get a warning about Freetype extension not compatible with sub module HTML. This is perfectly fine, we’re not going to use it there. Go ahead and say “Yes, build it!” After that, the process starts, the dependencies are downloaded and after some time the generation is complete.

The time has come to import our project into Android Studio. Open up Android Studio, go to “File” -> “Open” -> go to your generated project folder and select “build.gradle” file. After that, the project is being imported. Great, we have our project opened! Congratulations on finishing the first step.

Setting up the Desktop Version

First thing’s first, let’s make testing the game comfortable without having to run it on Android. We’re going to configure libgdx project to run as a desktop application. In Android Studio, go to Run -> Edit Configurations -> Press the ‘+’ Icon (Add new configuration) -> select ‘Application.’

runsettings

Launcher Settings

At the top of the window that appeared, in the “Name” field, replace “Unnamed” to “Desktop Launcher.” (or whatever name you want to, this is purely cosmetical and is there for your own convenience).
In Main Class field, select your “DesktopLauncher” class.
The working directory should be located in YourProjectFoler/android/assets. This is necessary so that our desktop application would be able to read sprites intended for android.
Use Classpath of module” should list “desktop.”
Press OK.

The new option should appear in the dropdown list on top of the screen (near the run button triangle). Choose it.

Then press “Run” button. (The green triangle to the right) or simply press “Shift + F10.” This will build and launch your program. Here’s what you should see:

Great, you’re the boss! You see the initial screen, this is what the template project for libgdx looks like.

result

Initial Screen

Going Further, Project Structure Explained

In the panel on the left, you see the list of our subprojects/packages.

There’s the core module, which contains the code of our game. It is universal for all platforms (Desktop/Android/Ios/Html). But if you go for the desktop folder, you’ll see that it contains DesktopLauncher class. It is responsible for running our game on Desktop Platforms. We’ll be writing the Desktop Specific code here. Same is relevant for all the other platforms. For example, our Android Package Folder will contain ad handling code. Since the mechanism of how ads are displayed will probably be different on every platform, we can’t put Admob’s code (google’s library for displaying ads on Android) into core folder.

Project Structure

Project Structure

That concludes lesson 1. In lesson 2, we’ll try loading sprites and create a simple background.

Git commit: https://github.com/vladimirslav/dodginghero/commit/c37a9292d8bf06551abb8f5db289e1f033d5effc

Some Practical Things I’ve learned from developing my first game

Developing your first game is like walking into uncharted waters. You might read up a lot, but you will still encounter some problems that will be avoided on your next game. Here’s what I’ve noticed while working on my first big game.

Error Handling and Reporting

What seems like a luxury at first, quickly becomes a necessity when your game goes live. Build your system with that in mind. Steam offers a good error reporting service in case the game crashes, but it needs the data to send. In my case – I hold the stack of function calls and some arguments (about 10 entries) so there would be at least some information on when the game crashed. It’s not always enough, but it’s better than nothing.

Savegames

You ought to start thinking about implementing savegames at once. The more your game grows, the more data is added (i.e. player in my game had no need to save an army at first, but it became a must later on). The longer you wait, the harder it will be to implement. When I realized that I needed map savegames in Blades of the Righteous (already when the game has been released), I had to drop everything and work 3 days, 12hours nonstop just to implement and test everything. The rush and stress could have been avoided had I planned it right at first.

Literals

Sure, sometimes you just want to make a button and hardcode “Start” on it. My advice: don’t. Move all the string literals that you have in code (those that are visible to your users) into an external file. That way when you want to translate the game, the process won’t be painless. Right now I’d have to rewrite everything if I wanted to translate my game (I might actually do this).

Screen Resolution

Especially if you are working on 2d game. Read up on how others solve it. I had to realize that it’s the problem only after release (when people started explicitly asking for fullscreen). I’ve intended the game to be windowed, like “Knights of Pen and Paper”, first part (Awesome game, love it). However, I’ve been getting lots of requests to support fullscreen. In this cases, you can stick to your opinion (“Working as intended!”) or actually listen to people and their wishes. Making good resolution support also makes your game much more easier to record for letsplayers.

I think that’s all I can remember for now. If you have any similar experiences and things your are paying attention to – feel free to share them in comments.

An amateur research of stock trading + Learning GO Lang

I’ve been looking into a possibility to get familiar with GO language for some time, but recently I had a reason: a weekend project where I could test a theory about stock trading.

I’ve entered a discussion with my colleagues about why it does not work to buy stock right before the ex-div date to receive the dividends and then to sell them right away. In my experience, it has a simple explanation: after the ex-dividend date, the price drops accordingly to the amount of dividends paid. But let’s have a deeper look and see if it’s really like that.

For that, I will need to get a list of stock symbols, then get the list of ex-div dates for some years and compare historical prices before and after dividend payment to check if it would have been financially viable to buy stock right before ex-div date and sell them afterwards (in my experiment – 5 days prior to ex-div to buy and 5 days prior to ex-div to sell).

Let’s start with stockparser package, the core concepts, file Stockparser.go. Set up imports and structure to store stock record results after simulated trading:

package stockparser

// set up imports
import (
    "fmt"
    "net/http"
    "encoding/csv"
    "io"
    "strconv"
    "strings"
    "time"
    "math"
    "os"
)

// string formats to access yahoo finance api and get csv-formatted data
// list of historical dividend payments and their dates:
const DIVIDEND_LIST_FORMAT =     "http://real-chart.finance.yahoo.com/table.csv?s=%s&a=00&b=1&c=%d&d=12&e=31&f=%d&g=v&ignore=.csv";
// list of prices on days prior/after the ex-div dates:
const CLOSE_PRICE_LIST_FORMAT =  "http://real-chart.finance.yahoo.com/table.csv?s=%s&a=%d&b=%d&c=%d&d=%d&e=%d&f=%d&g=d&ignore=.csv";

// struct to store Stock Parsing result for sorting/comparison purposes later
type StockRecord struct {
    Symbol string
    Earnings float64
}

To get a stock record data, we will need the following information. First, fetch the ex-dividend dates and the amount paid, then go through each date and get the prices before and after, then calculate the profits. The dividend list fetching is going to be reviewed first.

Function getYearsDividend takes the http link and fetches the csv data from it. It is pretty straightforward: try to get the data, if something is returned go line-by-line:

func getYearsDividend(yearLink string) [][]string {
    
    var result [][]string
	response, err := http.Get(yearLink);
	if err != nil {
            fmt.Println(err)
	} else {
            defer response.Body.Close()
            csvr:= csv.NewReader(response.Body)
            rec, err := csvr.Read()
            var first bool = true
        
            for err == nil {
                if (first) {
                    // ignore first line as it contains the names of the columns
                    // but not the data
                    first = false;
                } else {
                    result = append(result, rec)
                }
                rec, err = csvr.Read()    
            }
        
            if err != io.EOF {
                fmt.Println(err)
            }
	}
   

    return result
}

ReadDividendData (Important: capital leter first – it is going to be exported for use in other files) function gets the list of dividend payments for symbol in the years between(including) yearStart and yearEnd. It takes additional parameters: baseMoney is how much money (in USD) is going to be invested in stock purchase, daysBuyBefore and daysSellAfter indicate how many days do we wait before buying and selling (and takes the historical prices for these days accordingly – if ex-div is fifth of February 2015, and daysBuyBefore equals 2, the system is going to try to fetch historical closing price of February third) and finally, commission value shows how much money to be substracted from baseMoney as payment for the deal (my bank takes a fixed amount).

    const DATE_INDEX int = 0
    const DIVIDEND_INDEX int = 1

func ReadDividendData(symbol string,
                      yearStart int,
                      yearEnd int,
                      baseMoney int,
                      daysBuyBefore int,
                      daysSellAfter int,
                      commission float64) StockRecord {
    // this will store the sum of all possible trades for that symbol
    // that were made during the given time frame
    var sum float64 = 0;
    
    var link_str string
    // form the link - insert the value
    link_str = fmt.Sprintf(DIVIDEND_LIST_FORMAT, symbol, yearStart, yearEnd)
    
    // get the array of dividends - dates/amounts paid
    // yahoo finance csv format requested by format link
    // just includes the date and dividend in one string
    var date_dividend [][]string = getYearsDividend(link_str) 

    // create a log file to store extended data
    f, err:= os.Create("res/" + symbol + ".txt")    
    if err == nil {
        defer f.Close()
        // go through every date-dividend record and calculate the total sum
        // from every one of them
        for line := range date_dividend {
            var divPrice float64 = 0
            // convert the dividend price from string to float
            divPrice, err := strconv.ParseFloat(date_dividend[line][DIVIDEND_INDEX], 64)
            if (err == nil) {
                if err == nil {
                    sum += calculateDividendSum(symbol,
                                                date_dividend[line][DATE_INDEX],
                                                divPrice,
                                                daysBuyBefore,
                                                daysSellAfter,
                                                baseMoney,
                                                commission,
                                                f)
                }
            } else {
                f.WriteString(err.Error())
            }
        }
    }
    
    f.WriteString("\n=========\n")
    f.WriteString("Final Sum: " + strconv.FormatFloat(sum, 'f', 3, 64))
    
    return StockRecord{symbol, sum};    
}

The next intermediate function is calculateDividendSum which fetches historical prices:

const DATE_YEAR_INDEX = 0;
const DATE_MONTH_INDEX = 1;
const DATE_DAY_INDEX = 2;

const HISTORICAL_HIGH_INDEX = 2;

func calculateDividendSum(symbol string,
                          dateUnprocessed string, 
                          dividendBonus float64,
                          daysBuyBefore,
                          daysSellAfter,
                          moneyForPurchase int,
                          commission float64,
                          f *os.File) (result float64) {
    result = 0
    // date is passed as yyyy-mm-dd
    // first explode it into logical chunks, removing "-" and placing
    // year, month and day into separate indexes of a string array
    var dateSeparated []string = strings.Split(dateUnprocessed, "-")
    
    // then convert them to numbers
    var year int64
    year, _ = strconv.ParseInt(dateSeparated[DATE_YEAR_INDEX], 10, 64)
    
    var month int64
    month, _ = strconv.ParseInt(dateSeparated[DATE_MONTH_INDEX], 10, 64)
    
    var day int64
    day, _ = strconv.ParseInt(dateSeparated[DATE_DAY_INDEX], 10, 64)

    // calculate the dividend date
    var divDate time.Time = time.Date(int(year), time.Month(month), int(day), 0, 0, 0, 0, time.UTC)
    // then substract given amount of days to get the date when we purchase the stock
    var buyDate time.Time = divDate.AddDate(0, 0, -daysBuyBefore)
    // then add given amount of days to get the date when we sell the stock
    var sellDate time.Time = divDate.AddDate(0, 0, daysSellAfter)
    
    var datalink string
    openYear, openMonth, openDay := buyDate.Date()
    closeYear, closeMonth, closeDay := sellDate.Date()

    // form the proper link to request a historical dates between buy and sell date
    datalink = fmt.Sprintf(CLOSE_PRICE_LIST_FORMAT,
                           symbol,
                           int(openMonth) - 1,
                           openDay,
                           openYear,
                           int(closeMonth - 1),
                           closeDay,
                           closeYear)

    response, err := http.Get(datalink);
    fmt.Println("========");
    fmt.Println("Getting Data from: " + datalink + " , dividend date: " + divDate.String());

    if err != nil {
        fmt.Println(err)
    } else {
        defer response.Body.Close()
        // the csv format:
        // Date,Open,High,Low,Close,Volume,Adj Close
        csvr:= csv.NewReader(response.Body)
        rec, err := csvr.ReadAll()
        
        if (err == nil) {
            f.WriteString("===========\n");
            f.WriteString("Getting Data from: " + datalink + " , dividend date: " + divDate.String())
            f.WriteString("\n")

            var buyCost float64 = 0
            var sellCost float64 = 0
            
            // buy price is at the bottom of the list (earliest date)
            // respectuflly, sell price is on top (we sell for that price)
            buyCost, errBuy := strconv.ParseFloat(rec[len(rec) - 1][HISTORICAL_HIGH_INDEX], 64);
            sellCost, errSell := strconv.ParseFloat(rec[1][HISTORICAL_HIGH_INDEX], 64)
            if errBuy == nil && errSell == nil && err == nil {     
                result = summarizeData(buyCost, sellCost, dividendBonus, float64(moneyForPurchase), commission, f)
            }                
        }
	}
    
    return result
}

The final function is summarizeData which simply adds values together:

func summarizeData(buyPrice float64,
                   sellPrice float64,
                   dividendBonus float64,
                   budget float64,
                   commission float64,
                   f *os.File) float64 {
                    
    // how many stock can we buy with money we have? 
    // substract commission from our budget and divide by price of one stock
    var buyAmount int = int(math.Floor((float64(budget) - commission) / buyPrice));
    
    // how much money we actually spent? 
    // they can be leftover money if we had budget if we have
    // for example 40 USD in remaining budget and one stock price is 30 USD
    var buyMoneySpent float64 = float64(buyAmount) * buyPrice + commission;
    
    // how much money do we get from selling by sellPrice 
    // after we get the dividend? substract commission 
    // because it is charged on sell operations too
    var sellMoneyGained float64 = float64(buyAmount) * sellPrice - commission;
    
    // how much money did we actually get from dividend?
    // multiply stock amount with dividend payout for one stock
    var dividendMoneyGained float64 = dividendBonus * float64(buyAmount);
    
    // calculate final balance
    var balance float64 = dividendMoneyGained + sellMoneyGained - buyMoneySpent;
    
    // log into file
    // Proper way would be to make one more function
    // But since this is a weekend project
    // I try to forgive myself
    var logData = fmt.Sprintf(`BUYPRICE: %f,
                               MONEY SPENT TO BUY: %f,
                               AMOUNT BOUGHT: %d,
                               SELLPRICE: %f,
                               DIVIDEND PRICE: %f,
                               AMOUNT GAINED FROM DIVIDENDS: %f,
                               AMOUNT GAINED FROM SELL: %f,
                               TOTAL PROFIT IN THE END OF THE TRANSACTION: %f`, 
                               buyPrice,
                               buyMoneySpent, 
                               buyAmount,
                               sellPrice,
                               dividendBonus,
                               dividendMoneyGained,
                               sellMoneyGained,
                               balance)     
    f.WriteString(logData);
    f.WriteString("");
    
    return balance
}

The main File stock.go is simple: read csv file with list of symbols on my computer (it should be customized according to your list):

package main

import (
    "fmt"
    "stockparser"
    "os"
    "time"
    "encoding/csv"
    "io"
    "sort"
    "strconv"
)

// you need those functions in order to sort the stock records:
type byEarnings []stockparser.StockRecord
func (arr byEarnings) Len() int { return len(arr) }
func (arr byEarnings) Swap(i, j int) { arr[i], arr[j] = arr[j], arr[i] }
func (arr byEarnings) Less(i, j int) bool { return arr[i].Earnings < arr[j].Earnings } 

func main() {
    csvfile, err:= os.Open("companylist.csv")
    
    if err != nil {
        fmt.Println(err)
        return
    }
    
    defer csvfile.Close()
    
    var records byEarnings
    
    reader := csv.NewReader(csvfile)
    rec, err := reader.Read()
    var first bool = true
    var counter int = 0
    fmt.Println("Reading data...")
    for err == nil {
        if (first) {
            first = false;
        } else {
            fmt.Println("Reading line " + strconv.Itoa(counter))
            records = append(records, stockparser.ReadDividendData(rec[0], 2012, 2015, 4000, 5, 5, 18));
            // set the delay in order not to flood the yahoo server with http request
            time.Sleep(5000 * time.Millisecond)
        }
        rec, err = reader.Read()
        counter++
    }
    
    if err != io.EOF {
        print(err)
    }
    
    fmt.Println("Sorting Data")
    sort.Sort(records)
    fmt.Println("Done")
    
    for _,element := range records {
        fmt.Println("S: " + element.Symbol + " Earnings: " + strconv.FormatFloat(element.Earnings, 'f', 3, 64))
    }
    
}

To sum things up: in the end we have a GO program that fetches the data from yahoo finance and summarizes it in order to evaluate stock purchases right before ex-div payouts. I might make a separate article if I find results interesting enough (and if I got the large enough list of stock symbols to evaluate). You can get the full source code at my github:
https://github.com/vladimirslav/go-dividend-checker

Implementing A* algorithm using C++ templates

While developing my game, blades of the righteous, I’ve decided to make better pathfinding both for AI and for the player (the units can be given orders to move through multiple tiles – we need to find the optimal path). As I’m probably going to encounter the problem quite often in my next games, I’ve decided to make a universal function for pathfinding that returns the tile path through the generic field. The use of C++ template comes to mind.

Used this article as a reference: http://www.gamedev.net/page/resources/_/technical/artificial-intelligence/a-pathfinding-for-beginners-r2003


A bit of a background: I usually make 2d game maps as 2d array of pointers to units. If tile is empty, it contains nullptr. Otherwise it points to the unit.

Unit* field[FIELD_W][FIELD_H]
field[0][0] = nullptr; // field with coordinates 0,0 is empty
field[1][1] = myUnit; // field with coordinates 1,1 contains myUnit

Seems pretty straightforward, but the problems began when I’ve introduced the units that take two tiles. The Unit class still has only one coordinate pair (x and y), but now the width has been added into the equation. That adds lots of border cases, like:

  • What happens, if our unit of length 2 tries to reach unit to the right of it? For the sake of example, let’s say that our unit is on tile (1,1), the unit that we need to reach is on (7, 1). In that case, the final destination is going to be (1,5) – because our unit occupies both (1,5) and (1,6) and therefore stands near by (1,7)
  • What happens if both units have the length of 2 tiles? What happens if our target is to the right? Then we’d have to approach (targetX – 2, targetY) coordinates.
  • What if our destination tile is empty, but is on the border of the map? That means our unit would not be able to stand there because he lacks length.

Additional data structures/functions are introduced:

// tile, == operator needed to use it with std::find
struct TileCoords
{
    int x;
    int y;
    bool operator==(const TileCoords& other) const
    {
        return x == other.x && y == other.y;
    }
};

// inner tile info, necessary for use within algorithm:
struct TileInfo
{
    TileCoords comeFrom;
    bool isStartingTile;
    bool isVisited;
    int G; // in my case - basically distance from starting tile if you follow 
           // the chosen path (in more generic case: how expensive is it to get here)
    int H; // our guess how much we need to move to reach destination from 
           // that time (it's inaccurate most of the time, but we need to use something as a prediction)
};

using tile_list = std::vector; // define a variable type name for better code readability

// do given x and y coordinates belong to the field with width w and height h?
bool areValidCoordinates(int x, int y, int w, int h) 
{
    return (x >= 0 && y >= 0 && x < w && y < h);
}

// prediction function for H value, basically calculates the distance between two points
int HFunc(int xStart, int yStart, int xDest, int yDest) 
{
    return std::abs(xStart - xDest) + std::abs(yStart - yDest);
}

Therefore, to make A* as generic as possible, we will need a function template:

template <typename T> tile_list Astar(T*** field, // link to the battlefield
                          size_t w, // battlefield width
                          size_t h, // battlefield height
                          bool(*checkFunc)(const T*), // function that checks whether 
                                                      // the given field is available
                                                      // to be moved on
                          int xStart, // starting tile x (where the units stands at)
                          int yStart, // starting tile y (where the unit stands at)
                          int xDest,  // destination tile x
                          int yDest, // destination tile y
                          bool include_destination, // do return destination tile 
                                                    // in the resulting final path?
                          int unit_w) //unit width
{
    if (areValidCoordinates(xStart, yStart, w, h) == false)
    {
        return {}; //empty list
    }

    // check if unit can actually fit in destination
    if (include_destination)
    {
        for (int newX = xDest + 1; newX < xDest + unit_w; newX++)
        {
            if (areValidCoordinates(newX, yDest, w, h) == false)
            {
                return{}; // empty list, one of the destination tiles is out of bounds
            }

            if (checkFunc(field[newX][yDest]) == false)
            {
                return{}; // empty list, one of the destination tiles is occupied
            }
        }
    }

    tile_list closed_set;
    tile_list open_set;

    std::vector<std::vector> evaluatedCoords(w); // array of array

    // initialize values, calculate initial predictions:
    for (size_t x = 0; x < w; x++)
    {
        evaluatedCoords[x] = std::vector(h);
        for (size_t y = 0; y < h; y++)
        {
            evaluatedCoords[x][y].isVisited = false;
            evaluatedCoords[x][y].G = 0;
            evaluatedCoords[x][y].H = HFunc(x, y, xDest, yDest);
        }
    }

    bool destinationReached = false;
    // add starting tile to open list
    evaluatedCoords[xStart][yStart].G = 0;
    evaluatedCoords[xStart][yStart].isStartingTile = true;
    evaluatedCoords[xStart][yStart].isVisited = true;

    if (areValidCoordinates(xStart, yStart, w, h))
    {
        open_set.push_back({ xStart, yStart });
    }

    // while we have not reached destination
    // and there are tiles that can still be evaluated
    while (open_set.empty() == false && destinationReached == false)
    {
        TileCoords currentTile;
        int minF = w * h; // minimum cost that is required to reach destination
        size_t tileNum;   // tile index number
        // select assumed lowest-cost path
        for (size_t i = 0; i < open_set.size(); i++)
        {
            int F = evaluatedCoords[xStart][yStart].G + evaluatedCoords[xStart][yStart].H;
            if (F < minF)
            {
                tileNum = i;
                currentTile = open_set[tileNum];
                minF = F;
            }
        }

        // make an array of adjacent coordinates
        TileCoords adjacentCoordinates[] = { { currentTile.x - 1, currentTile.y }, 
                                                { currentTile.x + 1, currentTile.y },
                                                { currentTile.x, currentTile.y - 1 },
                                                { currentTile.x, currentTile.y + 1 } };

        // ... then go through it and check the new possible tiles
        for (int i = 0; i < sizeof(adjacentCoordinates) / sizeof(*adjacentCoordinates); i++)
        {
            if (areValidCoordinates(adjacentCoordinates[i].x, adjacentCoordinates[i].y, w, h))
            {
                if (std::find(closed_set.begin(), closed_set.end(), adjacentCoordinates[i]) == closed_set.end())
                {
                    int adjX = adjacentCoordinates[i].x; // to make code look cleaner
                    int adjY = adjacentCoordinates[i].y; 
                    // if this tile has not been visited:
                    if (std::find(open_set.begin(), open_set.end(), adjacentCoordinates[i]) == open_set.end())
                    {
                        // we found are destination
                        if (adjX == xDest && adjY == yDest)
                        {
                            evaluatedCoords[xDest][yDest].comeFrom.x = currentTile.x;
                            evaluatedCoords[adjX][adjY].comeFrom.y = currentTile.y;
                            destinationReached = true;
                            break;
                        }

                        // see if found tiles are valid through the whole unit width
                        bool validTiles = true;
                        for (int newX = adjX; newX < adjX + unit_w; newX++)
                        {
                            // coordinates are valid?
                            if (areValidCoordinates(newX, adjY, w, h) == false)
                            {
                                validTiles = false;
                                break;
                            }

                            // field can be visited?
                            if (checkFunc(field[newX][adjY]) == false)
                            {
                                validTiles = false;
                                break;
                            }
                        }
                        
                        // if newfound tile is OK:
                        // we have an unocupied field
                        if (validTiles)
                        {
                            // say that we've came to evaluated coordinates from the current tile
                            evaluatedCoords[adjX][adjY].comeFrom.x = currentTile.x;
                            evaluatedCoords[adjX][adjY].comeFrom.y = currentTile.y;
                            evaluatedCoords[adjX][adjY].G = evaluatedCoords[currentTile.x][currentTile.y].G + 1;
                            open_set.push_back(adjacentCoordinates[i]);
                        }
                    }
                    else
                    {
                        // if we visited this tile already
                        if (evaluatedCoords[adjX][adjY].G > evaluatedCoords[currentTile.x][currentTile.y].G + 1)
                        {
                            // but the path would be shorter if we moved to this tile
                            // from the other one
                            evaluatedCoords[adjX][adjY].comeFrom.x = currentTile.x;
                            evaluatedCoords[adjX][adjY].comeFrom.y = currentTile.y;
                            evaluatedCoords[adjX][adjY].G = evaluatedCoords[currentTile.x][currentTile.y].G + 1;
                        }
                    }
                }
            }
        }

        // move the current tile to visited
        closed_set.push_back(currentTile);
        // remove it from unvisited tiles
        open_set.erase(open_set.begin() + tileNum);
    }

    if (destinationReached)
    {
        // let's make a path
        // go backwards from destination
        tile_list path;
        if (include_destination)
        {
            path.push_back({ xDest, yDest });
        }

        TileCoords currentTile = evaluatedCoords[xDest][yDest].comeFrom;

        // ... until we reach the starting tile
        while (currentTile.x != xStart || currentTile.y != yStart)
        {
            path.push_back(currentTile);
            currentTile = evaluatedCoords[currentTile.x][currentTile.y].comeFrom;
        }

        return path;
    }
    else
    {
        // could not find a way - return nothing
        return {};
    }
}


As a bonus, here’s the episode from the reworked battle system:

Managing hobby gamedev projects

When I was younger, working on hobby projects has been a huge problem: laziness combined with loss of enthusiasm both took their toll on my results. Now, however, while being far from perfection, I have found some personal techniques that help me to preserve enthusiasm and allow me to persist through the whole process while managing it more effectively. At one point I have been working 50h/week and studying about 30h and still found four or five hours during the week for my programming hobbies. Here are some technical tools and methods I’m using to keep developing:


Don’t be afraid to cut your losses

This has to be the first point. Based on that, if you cannot build a prototype in 2 week spare time and see how it plays – don’t bother. It would suck to develop the prototype for 2 months during the weekends and after-work hours and then see that it is completely unplayable.


Enthusiasm passes, goals stay. Write them down.

When you get an awesome idea, you feel excited. You see the final product and imagine how great it is going to be. Then, as you start developing, you notice that your “honeymoon phase” has passed, you’re no longer in love with the game you are making and you are now irritated by the time it will take to develop. The image of the final version you had in the beginning now gets blurry: you’ve spent time, you somehow get the idea what do you want to see, but now you feel the lack of enthusiasm to do something: you just feel the weight of responsibility and necessary man-hours required to complete the game. You’re (hopefully) halfway through, but you have no idea how to finish the other half, because you’re feeling so lazy that you’d rather watch a turtle race than write a new code lines.

Here’s what you need to do: as soon as you have the initial vision of the game, start writing down issues, split it into smaller sub-tasks. For example, when I’ve started developing my Blades of the Righteous game, I’ve began using bitbucket’s built-in issue tracker when I had an awesome idea of a feature. That way I’ve made lots of small issues like “Check distance when attacking”, “Add Item System”, “Allow player to inspect objects on game map”. You get the idea. My enthusiasm is almost gone now, but the open tracker issues are what keeps me going: the goal (to publish the game) remains, and I know exactly what I have to do to get to it. Speaking about bitbucket:


Use version control

If you are a professional software engineer, you’re probably already doing it. It is very important to do so for your hobby projects: not only it allows you to make backups of your projects, enforcing additional level of data safety, it also allows you to revert unnecessary changes / mistakes and see the code changes from the previous versions which saves you time. Speaking about the previous versions: if I ever get discouraged, I just go to my repository logs and see my progress.

Another important thing regarding logs: use meaningful commit messages. I’m pretty sure you won’t remember what did you mean with “Fixed a bug” message. Compare it with “Fixed a bug in combat when attack damaged the friendly unit.” It’s also going to make it easier for you to search for the necessary commit should something go wrong with your new changes.


Rather than increasing the number of game features, try to decrease it

It seems that perfection is attained not when there is nothing more to add, but when there is nothing more to remove” – Antoine de Saint Exupéry.

I’m sure your game will be cooler with all those 200 droppable items. But do you really need them? Unless you are A+ developer working 60+ hours a week on your dream game, try to reduce the content to a minimum. I’m not saying “remove everything”, I’m saying “remove everything that is not of the essence.” Don’t give up on things that you think will be great, but choose your battles carefully.

More than that: don’t bother to make all the features at once. Try to get your game going as soon as possible and then give it to your friends. They will provide you with feedback. Listen to it.


This is all I wanted to tell. Don’t give up on your aspirations: even if in the end you are the only one who plays the game you made, that still means that there IS a game to play. Good luck!

Using pointers to struct members in template functions


After encountering a need to implement functional analysis indicators, I’ve encountered a problem: I have two structures which I am actively using to store market data (simplified version is given here):

Candle is used to store the market data for each period of time (for example, every 30 minutes):


struct Candle
{
    double open;
    double close;
    double high;
    double low;
};


RangeBar is used to focus only on price fluctuations, it has constant height (therefore we do not need to know the open price and store the height separately: it is usually stored as a system constant)


struct RangeBar
{
    double close;
    bool is_rising;
};


What should be done if I want to calculate Simple Moving Average(or simply SMA) value of 20 consequtive candle high or open prices? What if I want to calculate RangeBar close prices? Should I declare 3 functions for every one of them?

One of the possible solutions would be to implement a common class for both RangeBar and Candle, which has virtual Getter methods. However, a colleague of mine has suggested an alternative, much more elgant solution, using C++ templates with pointers to struct members as a template arguments.

Therefore, an SMA function will look like this:


template <typename T, double T::*member> double SMA(T* values, size_t length)
{
    double sum = 0;
    for (size_t i = 0; i < length; i++)
    {
        sum += values[i].*member; //make sure to dereference the member pointer
    }
    return sum / length;
}


Then, when I want to calculate the SMA, I just need to call the function with correct parameters. For example:


    double sma_close_range_bars = SMA<RangeBar, &RangeBar::close>(bars, bar_amount);
    double sma_high_candles = SMA<Candle, &Candle::high>(candles, candle_amount);
    double sma_low_candles = SMA<Candle, &Candle::low>(candles, candle_amount);


Voila. Now we have a universal solution for this type of problems.