Category Archives: General

Content not bound by a common subject

Lessons learned after two years as an indie developer

As the release of out third game, Lazy Galaxy, is coming tomorrow, I thought it would be a good time to take a break and take a look on two years of my life as indie developer.

Why/who should care? I don’t think you’ll learn something here if you develop games for 2+ years. For those who plan to start or are in the gamedev process, I hope this helps.

Short info on my background:
28 years old. Live in Riga, Latvia. Started as a PHP developer -> Worked as C++ dev for about 4 years -> quit my job and started developing games on LibGDX,for about a year, and then moved to Unity, for another year. Right now I own a gamedev studio with 2 other employees.

Should I quit my job to become indie:

A lot of people say “don’t,” especially if you don’t have any successful/published titles. I was one of the people that did that anyway. For me, the logic is simple: as you age, time becomes more important than money. If I spend 2 hours after every work day, there’s no way I’m going to be good as the guy who spends 10 hours (in case he works as effectively as I do). I sucked at gamedev two years ago and I’m not great today, but I’m doing much better. You spend time, then you improve. I started late, so if I want to be as good as others – I need to practice much more and work much harder.

My mother said that if I quit my main job, then it will be much harder to find a new one if I take a break. The thing is, your own company is not the same as taking a break, as long as you have something to show for it. If you complete projects – you are essentially working for yourself. It’s as serious as you treat it. I still get job offers from other companies, but for now I turn them down.

Basically, if you feel like you need to quit your job to do indie – quit it after you have stable professional background, possible freelance contacts and some money stashed.

The money:

I think it’s reasonable to expect that you won’t be making any money for the first year. My second year was easier (people started to notice my work and I got some projects for my company out of it). Expect hard times and have a long-term plan, together with possible short-term freelance opportunities.

The opportunity costs over those two years for me were probably potential ~$40k lost. In Latvia, you can comfortably live 3-4 years with this amount of money. We’ll see if it pays off in the future.

At first, I had to take some freelances to sustain myself further. After a while, I was able to get game-related jobs occasionally.

Health:

If you stay indoors for a long time, you’
re going to feel weak and demotivated. Fish oil helps, but try to spend more time outside. You need it.

Project Scope:

If your first game takes more than 6 months to make – reconsider. Our current game, Lazy Galaxy, took 9 months for my team to make and I can see that it’s already starting to strain and exhaust us. Our next projects will be 3-6 months tops. As you are starting out, it’s crucial to constantly get feedback. Making a game 2 years and then publishing it = in general is a too big risk for a small possible reward. I know, I know, there are exceptions and you can name them. But in general, it’s better to release four small polished games in a year than one, because you’ll be learning about game releases and getting the feedback much faster. Development is not that much of an issue (with code snippets from current asset stores and online communities you can pretty much do anything an indie wants). The biggest problem will be moving your project forward, getting noticed, marketing and building a community.

Marketing The Game:

I think that’s the most important one.

First, gamedev forums and subreddits are not really your audience. It’s easy to share there, but this probably won’t be the thing that helps you promote your game.

A side tale: in school, I was asking lots of girls about how they want to be courted by a guy. Often I got answers like “you need to compliment themor “give them gifts.Obviously, when I tried to do this, it never worked. Were they lying? Not at all, it’s just I’ve been missing an important detail: when they talked about flowers, compliments or other gifts, they were imagining that they already _like_ the person. They don’t like you because you give gifts or flowers, they like you first for their own reasons and then you give the gifts.

It’s the same when you try to promote your game: I think I’ve posted about 50 entries in screenshotsaturday over 2 years and not one of them took off. Out every game release has been followed by my own written press-release, always ignored by big press outlets.

The thing that made me think were youtubers. Lazy Galaxy did not take off on twitter, but I saw something that I did not see with my first two releases. A few (real ones, not fake accounts) 5k+ sub youtubers contacted me and asked for a copy to play. Then made videos. All by themselves. Others were more responsive than with out previous game when I messaged them.

Imagine that you’ve read one of the good posts about marketing your game. You’ve learned a lot. So you start doing it, expecting feedback. But it does not come, people mostly ignore it. You are confused, because you’ve read and done everything correctly, posted on twitter, informed the press, sent the game to influencers. When it comes to marketing – even if you do everything “by the book,” it’s not a gurantee that the game gets noticed. Aesthetics are the key. Those make your game noticed it (and then allow people to actually play it). Your game has to have style. It won’t work on a game that does not feel great (judging by the screenshots, not the actual gameplay).

In truth, you are telling people about something that they already like (but don’t know it yet), so after that they can take the steps and cover your game. If you regularly do all the classic stuff like screenshotsaturday, influencers and press with a pretty, solid, game – you will get noticed. I am 99% sure. I thought that it was mostly a matter of luck, but right now I’m just confident that you need to make a good game with visual appeal.

That translates to the next point.

Artist:

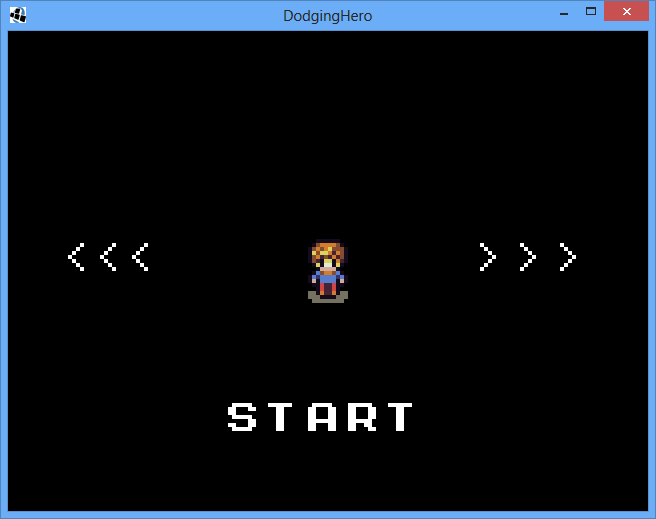
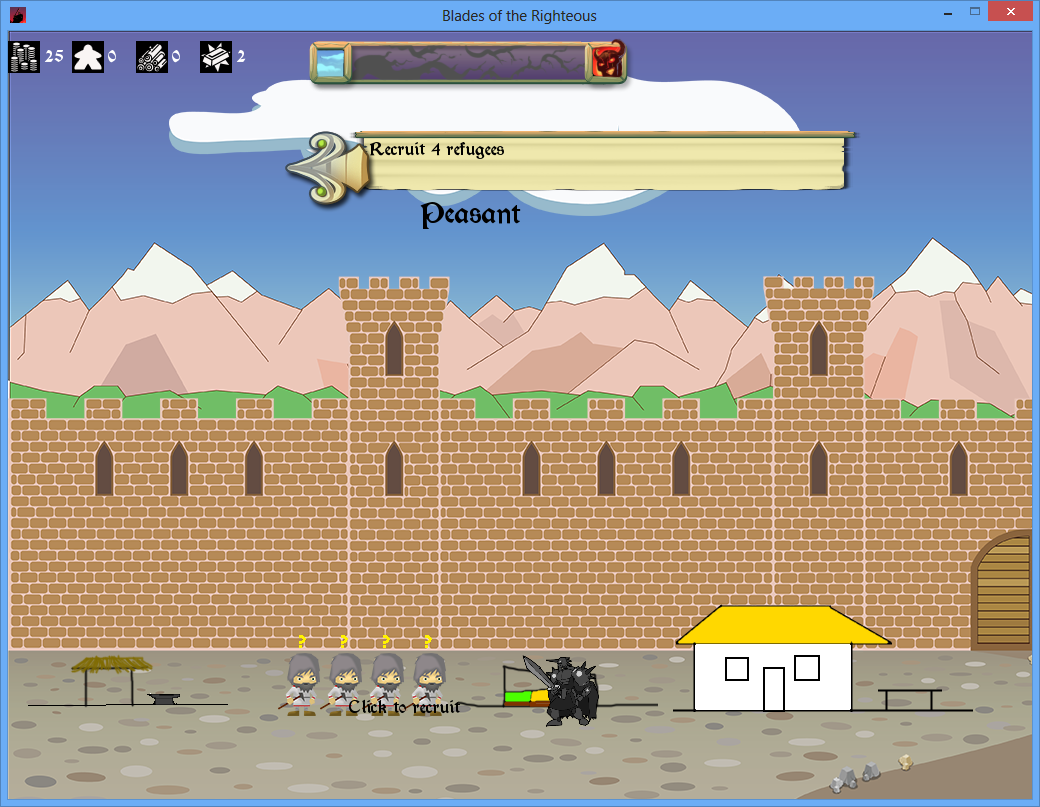
You need a style for your game. You need an artist who can work with you. All elements must feel like they belong to one style. On my first game, Blades of the Righteous, I made a mistake of commissioning arts from different artists or just buying and assets and that affected the overall feel and quality of the game. Don’t make mistakes that I did. Style matters, if you get assets – don’t get absolutely different ones from different creators. Even if they look cool separately, there’s a high chance that they won’t fit together.

At the end of my first game I was joined by my girlfriend, Helen. She became an artist and we’ve been making the games together. It has been a great journey of learning and we often feel like we’re at the beginning of our way, but we’re sure that we are moving somewhere.

During the third game, my friend Michael has agreed to work together. He’s been a valuable help due to his attention to detail and ability to thoroughly connect artistic and code sides of the project, something that I often could not do as well as him. That taught me that diversifying talent is important. He’s great because he can do something that I can’t do as effectively, and that gives me time to talk about the game, promote, translate and do QA checks.

Mentoring:

One of the things that got suggested by some articles when I started out was “find a mentor.” I’d love something like that, but I’ve emailed about 20 different experienced people from the industry to see if they can have 15-20 minute calls monthly/biweekly to mutually discuss gamedev things, but I never got a reply. At the current stage, I still need a mentor for some questions, but I don’t think I can get one without personally meeting them somewhere first.

On networking and having a gamedev business

Chances are, there are gamedev enthusiasts no matter where you live. Go to your local meetups, even if you are introverted like I am. Don’t go with some “let me be an extroverted business” guy mindset, but go to meet people with similar interests. Chances are, some of them will become friends. The conversations won’t feel forced if you are talking about the subjects that interest you both. The people will probably be more open and honest about your games too. You could also meet people that need your help, so that’s also a plus.

Make an effort. Especially if you are living in US / Western Europe. I think you have a great opportunity to talk with the people who achieved something in the industry, an opportunity that lots of us from other countries don’t have.

On the other hand, I think that (relatively) low living costs in Latvia help. I genuinely think that if you are a developer from US that’s working on established indie project – it might be worth going here to reduce your living expenses to ~$1k/month.

In Summary

I think that’s all I had in mind. I’m probably going to write a separate postmortem on Lazy Galaxy, but I wanted to make this one more personal/general advice oriented.

Overall, I see gamedev as something that I want to do for my whole life, so we’ll see if I manage to build a sustainable company in the end. Those been two tough years, but I’m optimistic about the future and actually looking forward to what happens next.

If you want to follow me: consider adding me on twitter, https://twitter.com/ColdwildGames


Case Study: what I learned for Gamedev marketing after running the Game Review Blog

Some backstory: when I published my first game in 2016, nobody wanted to take a look at it; I was getting no replies from anyone. With time, I got a review on two websites (and it felt good, even though one was pretty critical). In retrospective, I can understand them now: the game was not polished enough and I had to remake it 4 times in order to make it look like something that I’m not ashamed of. I’ve recently published another game and it has been better received (and I got a few reviews on the websites too). However, at that time I’ve been quite upset about this. If no one else was there: I wanted to give anyone a chance.

I’ve started my own project in December 2016, a simple site where I started to post short game reviews, http://shortgamereviews.com. So far I have 26 reviews, different games (all on Steam) of different grades of success. After doing this for more than 2 months, I feel like I have enough I can share.

The process:

Send a personalized letter (from my domain email), offer to review the game (either by key or by review copy), if it is received – do three steps:

Some observations:

  • Bigger developers / publishers give out the review versions much easier than smaller ones. (When in fact it’s the smaller one who needs it most). That surprised me greatly.
  • To expand on that: I know how many scam emails you get asking for the keys (hey, I get them too). There are ways to identify the fake ones ( https://www.reddit.com/r/gamedev/comments/2efovt/warning_fake_game_key_requests_and_tips_to_avoid/ ). TL;DR: If someone asks you for more than 1 key – he’s probably trying to scam you.
  • Overall: Saying „No” is fine, but you need to say it. In fact, you get more respect if you answer „No” than if you keep ignoring the letter, as that helps the review planning and actually shows you are considerate of someone’s time.

Advice for developers:

  • Make your email easily available. If someone has to click multiple links to finally get an email – you are risking losing a review. If someone has to google your name to get your email – you are in for the trouble unless you’re making the next “Half-Life”.
  • If you have a separate project email – make sure to check it regularly. (Had some “two weeks later” replies).
  • You get extra points if you have some sort of preview version. I personally never did it (because well, if you the only programmer on the team – you don’t have time for everything), but I was seriously impressed by the dedication of the games that did. They also normally turned out pretty great.
  • That’s perfectly fine not to give a review key; you don’t owe it to anyone
  • When you are approached by a review website, you can request the metrics. Personally, I had no trouble sharing them (and if someone said it’s too low – that’s OK too).
  • If you get a negative review supported by arguments – it’s not assault on you personally. Replying to a review is a good chance to give your opinion, as long as you stay objective.

Some personal realizations, which I keep in mind when talking to fellow game developers:

  • Don’t be afraid of honesty. If you write that the game is good, but in truth is not – that helps no one. Developers see their sales, so the best thing you can do to your fellow devs is to tell what you think (even if their game sucks). If I dislike something about my friends’ games – I tell it. That’s the best help you can give.
  • Even bad reviews add publicity to your game. Maybe it sounds stupid, but there’s a game for everyone. If your game keeps featured somewhere – that’s a higher chance to get noticed. Either by your fans who will give counter-arguments or by people who like trashy stuff (if your game is actually bad).


I’ve kept the promise. I obviously don’t get as many request as big game journals do, but so far I’ve been able to look into everything that has been sent in and give a personal feedback to everyone who asked (even if it was a unity game on itch.io).

Developing Multiplatform Game with LibGDX, part 24: improving progression and rewards

game progress balancing, replayability

Our stats affect the game, but what happens if you unlock low-level character after you’ve cleared lots of game stages with your high-level one? The difficulty simply won’t be up to par. We have to keep current stage numbers separately for each character.

In our GameProgress class, get rid of currentLevel variable (and also let’s make the naming less confusing). Also, get rid of SAVE_KEY_CURRENT_LEVEL constant. The game levels will be called „game stages” in order to avoid confusion. Add a new save key, called

private static final String SAVE_KEY_PLAYER_STAGE = "playerstage";

Right beside our levels variable, create a new array, called „stages”; Initialize it right beside our levels. Adjust the Load function to set stages to zero by default. Here’s how my Load function looks like now:

public static void Load()
{
    levels = new int[CharacterRecord.CHARACTERS.length];
    stages = new int[CharacterRecord.CHARACTERS.length];

    Preferences prefs = Gdx.app.getPreferences(PROGRESS_SAVE_NAME);

    for (int i = 0; i < CharacterRecord.CHARACTERS.length; i++)
    {
        levels[i] = prefs.getInteger(SAVE_KEY_PLAYER_LEVEL + i, i == 0 ? 1 : 0);
        stages[i] = prefs.getInteger(SAVE_KEY_PLAYER_STAGE + i, 0);
    }
//...

Don’t forget about Save function:

for (int i = 0; i < CharacterRecord.CHARACTERS.length; i++)
{
    prefs.putInteger(SAVE_KEY_PLAYER_LEVEL + i, levels[i]);
    prefs.putInteger(SAVE_KEY_PLAYER_STAGE + i, stages[i]);
}

Now, let’s get rid of errors which we inevitably got after removing currentLevel variable.

public static int getEnemyLives()
{
    return 3 + currentLevel * 2;
}

Becomes

public static int getEnemyLives()
{
    return 3 + stages[currentCharacter] * 2;
}

Let’s also add getEnemyDamage function (it makes sense to increase the damage as player’s hp increases too, right?)

public static int getEnemyDamage()
{
    return 1 + stages[currentCharacter] / 10; // increase damage every 10 stages
}

The Reset function needs to be heavily adjusted.

public static void Reset() {
    currentLevel = 0;
}


Forget about it. After player dies, let’s simply reduce his current stage by 5 (so he does not have to do everything from the beginning). We also need to reset player’s hp. Important note: when a new character is chosen in CharacterSelectionScreen, we also must reset player’s hp (since each char can have separate max hp now). Let’s introduce extra Boolean parameter to Reset, called resetProgress. It is only going to be true when player dies, and not simply changes the character.

public static void Reset(boolean resetProgress) {
    if (resetProgress)
    {
        stages[currentCharacter] -= 5;
        if (stages[currentCharacter] < 0)
        {
            stages[currentCharacter] = 0; // don't let it go below zero!
        }
    }

    playerLives = getPlayerMaxHp();
}

Now, let’s arrange the new reset calls. Go to CharacterSelectionScreen and alter the code of our next and prev buttons.

nextBtn.addListener(new ClickListener() {
    public void touchUp (InputEvent event, float x, float y, int pointer, int button) {
        GameProgress.currentCharacter += 1;
        if (GameProgress.currentCharacter == CharacterRecord.CHARACTERS.length)
        {
            GameProgress.currentCharacter = 0;
        }
        GameProgress.Reset(false);
        prepareUi();
    }
});
…
prevBtn.addListener(new ClickListener() {
    public void touchUp (InputEvent event, float x, float y, int pointer, int button) {
        GameProgress.currentCharacter -= 1;
        if (GameProgress.currentCharacter < 0)
        {
            GameProgress.currentCharacter = CharacterRecord.CHARACTERS.length - 1;
        }
        GameProgress.Reset(false);
        prepareUi();
    }
});

And fix the GameLogic a bit: firstly, we cannot simply increase current level when the enemy has less than 0 lives (we removed the variable, remember?). Let’s make a separate function inside the GameProgress, named increaseStage(). Let’s also grant player some money on level completion. Replace:

GameProgress.currentLevel++; 

With

GameProgress.increaseStage(); 

increaseStage implementation inside our GameProgress:

public static void increaseStage() {
    currentGold += 1 + stages[currentCharacter] / 4; // increase gold gain every 4 levels
    stages[currentCharacter]++;
}

The values are taken somewhat randomly, so only testing will show if those values are good. Always be on lookout to see what’s going on with the game balance. Two last changes:

player.takeDamage(1);
if (player.getLives() <= 0)
{
    GameProgress.Reset();
}

Pass true to our Reset function (we want to reduce levels when player has lost the game) and also use the new enemy damage vs player.


player.takeDamage(GameProgress.getEnemyDamage());
if (player.getLives() <= 0)
{
    GameProgress.Reset(true);
}

That should do it. Not much to see, but the gameplay-wise this will change a lot.

Relevant git commit: https://github.com/vladimirslav/dodginghero/commit/49e8b0fe0fa156e17acd6d4ab01d798296f70f03

Developing Multiplatform Game with LibGDX, part 19: basic character selection screen

Adding Different Playable Heroes

Allright, our enemies attack differently. But how can we diversify the gameplay of our player? Let’s introduce different playable characters.

First, let us ask ourselves, what do we want to display here? We want to make a screen where player chooses (and later – unlocks/upgrades) the character he wants to play with. Each character will have its strengths: it is important to give choice when it comes to game decisionmaking.

We’ll need to make a separate screen for that. In our screens package, create a new class, name it “CharacterSelectionScreen.” Make it extend DefaultScreen.

Similar to our GameScreen, we need a stage that is going to process player input / display UI elements. Declare it:

Stage uiStage;

We also need to track the currently selected character. Let’s make an integer index specially for that.

int currentCharacter;

The constructor is simple:

public CharacterSelectionScreen(DodgingHero _game) {
    super(_game);
    currentCharacter = 0; //TODO: Load it from settings later
    FitViewport viewport = new FitViewport(160, 120);
    uiStage = new Stage(viewport);
    Gdx.input.setInputProcessor(uiStage);
}

We create a stage using fit viewport to always maintain the resolution. We use our stage as inputProcessor, because it would allow stage to capture the inputs. Now we need to define dispose and render functions. Let’s make them real simple first.

@Override
public void render(float delta)
{
    Gdx.gl.glClearColor(0, 0, 0, 1);
    Gdx.gl.glClear(GL20.GL_COLOR_BUFFER_BIT);
    uiStage.act(delta);
    uiStage.draw();
}

@Override
public void dispose()
{
    Gdx.input.setInputProcessor(null);
    uiStage.dispose();
    super.dispose();
}

Render simply clears the screen, updates the stage and draws it. Dispose resets the input, then frees resources taken up by stage.

Finally, go to our DodgingHero.java class, and change

setScreen(new GameScreen(this));

to:

setScreen(new CharacterSelectionScreen(this));

This will make the game show us Character Selection Screen instead of GameScreen (at once) where we’ll be able to pick necessary characters. Run the game. You should see the black blank screen. Great! That means we could set our new screen.

Now, to progress further, let’s add a simple “Start” button. Well, not really a button since it’s going to be a text caption that you need to press to start the game. Still, it’s going to be great.

In our CharacterSelectClass, let’s prepare a new function, name it prepareUi(). We’re going to call it at the bottom of our constructor (right after Gdx.input.setInputProcessor(uiStage);).

The first version of the function looks like this:

void prepareUi()
{
    TextButton.TextButtonStyle buttonStyle = new TextButton.TextButtonStyle();
    buttonStyle.font = game.res.gamefont;
    buttonStyle.fontColor = Color.WHITE;
    TextButton startBtn = new TextButton("START", buttonStyle);
    startBtn.setPosition((uiStage.getWidth() - startBtn.getWidth()) / 2, uiStage.getHeight() / 6);
    startBtn.addListener(new ClickListener() {
        public void touchUp (InputEvent event, float x, float y, int pointer, int button) {
            dispose();
            game.setScreen(new GameScreen(game));
        }
    });
    uiStage.addActor(startBtn);
}

We’re creating a TextButton that has “Start” writte on it. First, we make the button style where we define the font and color of the font. If you have graphics – it’s also possible to define up/hover/down states of the button (however, I – don’t).

Then, the button is being initialized by passing the text and the style and setting the position. The trickiest part is handling button clicks: in this case we’re calling addListener and defining our own version of ClickListener, by overriding the touchup function. At this point, as soon as player clicks our “Start” button, the screen is going to switch for our GameScreen.

Finally, don’t forget to add out new button to the stage by calling addActor method! After that, run the game.

Good, we have a start button. Now let’s display our hero and make arrow-like buttons (that are going to be used later). Again, in this lesson, let’s just do a simple display, without functionality. At the end of our prepareUi function, add these lines:

Image heroSprite = new Image(game.res.player);
heroSprite.setPosition((uiStage.getWidth() - heroSprite.getWidth()) / 2,
                       (uiStage.getHeight() - heroSprite.getHeight()) / 2);
uiStage.addActor(heroSprite);

TextButton nextBtn = new TextButton(">>>", buttonStyle);
nextBtn.setPosition(uiStage.getWidth() * 5 / 6 - nextBtn.getWidth() / 2, uiStage.getHeight() / 2);
uiStage.addActor(nextBtn);

TextButton prevBtn = new TextButton("<<<", buttonStyle);
prevBtn.setPosition(uiStage.getWidth() / 6 - prevBtn.getWidth() / 2, uiStage.getHeight() / 2);
uiStage.addActor(prevBtn);

That’s it! After you run the game, you should see something like this now:

final_screen

That concludes lesson 19! In the next lesson, we’re actually going to work on implementing the character choice, but for now the screen should be enough. Relevant git commit: https://github.com/vladimirslav/dodginghero/commit/e46d43eac5dcba21b3e3df502a0706d1436885c3

Developing Multiplatform Game with LibGDX, part 17: progression and data persistence

Lesson 17: Progression and Data Persistance

So we’ve made a scene transition. But it does not make much sense: the game essentially is restarting. I believe that player needs some sense of progression. Let’s work on this today!

In our logic package, create a new class, called „GameProgress” –  we’re going to store player’s lives and level there. Now I usually store game progress in static variables. If you don’t like it – you may trying making a class and instantiate it accordingly once you start the game. Anyways, here goes:

public class GameProgress {

    public static int playerLives = 3;
    public static int maxPlayerLives = 3;
    public static int playerDamage = 1;
    public static int currentLevel = 0;
}

Not much to say: we’re going to store player lives, the maximum lives/damage our player can have (we might want to increase that value as game progresses!) and the current level.

Let’s start adding functions. We will be determining the health of the enemy according to the player’s progress. Let’s make a static function for that.

public static int getEnemyLives()
{
    return 3 + currentLevel * 2;
}

Nothing fancy. Enemy health will equal to the the current level multiplied by two while adding a constant value.

Now, I did not say data persistence in vain. Let’s implement Load/Save functions. LibGDX offers a really good way to work with simple text / setting files. It’s called Preference Files (https://github.com/libgdx/libgdx/wiki/Preferences). Not really suitable for saving complicated game data (use Binary Files http://www.javapractices.com/topic/TopicAction.do?Id=245 for that)., but will do for a simple game such as ours.

At the top of the GameProgress class, add a static string constants:

private static final String PROGRESS_SAVE_NAME = "progress";
private static final String SAVE_KEY_LIVES = "lives";
private static final String SAVE_KEY_LIVES_MAX = "livesmax";
private static final String SAVE_KEY_CURRENT_LEVEL = "currentlevel";
private static final String SAVE_KEY_PLAYER_DAMAGE = "playerdamage";

It will store the name of our save file, as well as lookup keys. After that, add two simple functions, named “Save()” and “Load()” respectively. Load function is a bit easier, let’s start with that:

public static void Load()
{
    Preferences prefs = Gdx.app.getPreferences(PROGRESS_SAVE_NAME);
    playerLives = prefs.getInteger(SAVE_KEY_LIVES, 3);
    maxPlayerLives = prefs.getInteger(SAVE_KEY_LIVES_MAX, 3);
    currentLevel = prefs.getInteger(SAVE_KEY_CURRENT_LEVEL, 0);
    playerDamage = prefs.getInteger(SAVE_KEY_PLAYER_DAMAGE, 1);
}

Pretty straightforward: open save file, then read integer values with getInteger function. The second parameter is default value (in case we’ve failed to load the value from the file).

Save function is bigger by one line:

public static void Save()
{
    Preferences prefs = Gdx.app.getPreferences(PROGRESS_SAVE_NAME);

    prefs.putInteger(SAVE_KEY_CURRENT_LEVEL, currentLevel);
    prefs.putInteger(SAVE_KEY_PLAYER_DAMAGE, playerDamage);

    prefs.putInteger(SAVE_KEY_LIVES, playerLives);
    prefs.putInteger(SAVE_KEY_LIVES_MAX, maxPlayerLives);

    prefs.flush();
}

We open the preference file, write the game progress there, then we call the “flush” command that actually finalizes the file writing, ensuring that our values are saved. That’s about it! Now let’s make use of our progress. First thing: go to the Enemy class and remove our DEFAULT_ENEMY_LIVES constant. We’re not going to need it anymore. Replace the constructor value with call to our static getEnemyLives function:

super(DEFAULT_ENEMY_LIVES);

now becomes

super(GameProgress.getEnemyLives());

The Player Class will also use some adjustments now. In our constructor, change the max_lives variable assignment to:

max_lives = GameProgress.maxPlayerLives;

Now move to our GameLogic class. Remove DEFAULT_PLAYER_LIVES constant and in our Player initialization, pass GameProgress.playerLives as the life amount.

player = new Player(
        MathUtils.random(MAX_BASE_X),
        MathUtils.random(MAX_BASE_Y),
        game.res,
        GameProgress.playerLives
);

One more thing: Let’s address the damage on bonus pickup.

else if (currentBonus.getBonusType() == Bonus.BONUS_TYPE_ATTACK)
{
    enemy.takeDamage(GameProgress.playerDamage);

And finally, we need to adjust the GameLogic part to account for victory or defeat. First, the victory (same function, after enemy takes damage):

if (enemy.getLives() <= 0)
{
    GameProgress.currentLevel ++;
    GameProgress.playerLives = player.getLives();

Just adjust the level and save the player’s lvies. Now, on defeat, let’s reset all the values. Check our OnEffectOver Method in GameLogic class. We need to add a few lines after player takes the damage:

@Override
public void OnEffectOver(WarningEffect effect) {
    if (effect.getFieldY() == player.getFieldY() &&
        effect.getFieldX() == player.getFieldX())
    {
        player.takeDamage(1);
        if (player.getLives() <= 0)
        {
            GameProgress.Reset();
        }
    }
}

Since we’re planning to reset a lot of functions (player’s lives / max lives / current level), it makes sense to make a function inside our GameProgress class to do those things.

public static void Reset() {
    playerLives = 3;
    maxPlayerLives = 3;
    currentLevel = 0;
    playerDamage = 1;
}

Now, the only thing left to do is to actually implement loading and saving. We load the data once the game is open. Adjust our DodgingHero class, create() function:

@Override
public void create () {
    res = new Resources();
    GameProgress.Load();
    setScreen(new GameScreen(this));
}

And dispose function here should do the save:

@Override
public void dispose () {
    GameProgress.Save();
    res.dispose();
}

Looks good! Now try to run the game. Complete one level and restart the game. You should notice that the data persisted (player lives and enemy has more lives now). Good job!

Relevant git commit: https://github.com/vladimirslav/dodginghero/commit/21dfa37a4f3cf190185e36281e70ffa6a99c20ea

Developing Multiplatform Game With Libgdx – part 2 – project structure

Heya! The next lesson adresses the project structure and introduces asset packing. The video turned out to be a bit confusing, but the extended transcript is below. Let me know if you have any questions!

What is a game and how we build it

If we think about it, what is a game? Let’s check out the main file, DodgingHero. If we really dumb it down, the game is a cycle of displaying info and getting user’s feedback. The game screen actually renews many times per second (FPS, frames per second, actually indicate this exact value). The render() function in Libgdx is doing exactly this. It cleans the screen (glClear command), then it draws our own things.

The create() function initializes our game. Those are the operations that need to be done once. Mainly, it’s resource allocation. We need to load the textures/sprites only once (the line img = new Texture(“badlogic.jpg”); does exactly that). We also initialize SpriteBatch (batch = new SpriteBatch();), essentially this is the structure that sends the commands to our graphic card.

On the opposite side, we have dispose() function, that is called after our game is done running. We need to free up resources. And this is exactly happens in this particular case: both batch and img are being disposed.

Now that we have a very general idea what’s going on, I’m going to tell you how I usually structure my projects. A good project structure ensures that project maintenance and code updates will go much smoother. As they say, “hours of planning can save you weeks of programming.”

Preparing our art

First thing first, let’s find some art for our prototype. I usually use opengameart if I want to build something fast, and this case will be no exception. After some search, I found http://opengameart.org/content/tiny-16-basic – tileset with some monsters and humans which we can use for our game prototype. I’m going to pick the tiles they have, pick two of them and will use them to show our initial background, repeated the tiles for the background. Essentially I’m doing some extra work here (because the tilesets on the link are already very neatly organized), but I need to show you what’s going on by an example.

In our project root folder (the same folder where we have “android”, “core”, “html” … folders) , let’s make a folder named “assets.” Inside that folder, make another folder, named “unpacked.” From the tileset, cut out one floor and one wall tile (I usually use paint.net, http://www.getpaint.net/index.html for that purpose, but the simple ‘paint’ will do for now).Each image should be 16×16 pixels in size, save them as ground.png and wall.png accordingly. Now, we have two tile sprites, but what do we do with them? For a better performance, all sprites should be put into spritesheets. (It takes time for the graphic card to switch between textures/sprites). It’s really not a problem for modern computers most of the time (for a small game), but I’d rather teach you to do things the ‘proper’ way first. In our Android Studio, go to desktop package and open DesktopLauncher. For Desktop version, we’re going to add texture packing. (Whenever we run desktop version, the sprites are going to be packed into one file. We’ll be able to use this this pre-generated file in the other platforms, like android). The main reason I’m doing it this way is because TexturePacker is not supported by some of our platforms (at least HTML), so I’d rather execute it on Desktop only.

In DesktopLauncher class, add the following private function:

static void Pack()
{
      TexturePacker.Settings settings = new TexturePacker.Settings();
      settings.maxHeight = 2048;
      settings.maxWidth = 2048;
      settings.pot = true;
      TexturePacker.process(settings, "../../assets/unpacked", "packed", "game");
}

Then, right at the start of main() function, add the call to Pack() function, it will look like this now:

public static void main (String[] arg) {
   Pack();
   LwjglApplicationConfiguration config = new LwjglApplicationConfiguration();
   new LwjglApplication(new DodgingHero(), config);
}

Loading the art

Select the DesktopLauncher configuration and run our program on it (first launch might take some time). Now go and check the android\assets\ folder. There should be a new directory, “packed” there. Inside that directory, there should be two files: game.png and game.atlas. First one is the picture of two tiles put together. The other one is actually a text file (you can check it out with any text editor, I use Notepad++). It is, like extensions says, an atlas, that describes different sprites in it and coordinates of those sprites in our new big picture.

Now we’ll have to load this atlas. The next thing we do, make a resource class, which will hold the graphical data. Make it in the same package as your main game class. In my case, I right click on “com.coldwild.dodginghero”, choose “New” and pick “Java Class.”

create-new

New Class Creation

Name it “Resources.” This one will be responsible for loading and storing the assets for our game. Go to your new file, and inside Resources class declare the public constructor and TextureAtlas variable gameSprites.

public class Resources {

    TextureAtlas gameSprites;

    public TextureRegion ground;
    public TextureRegion wall;

    public Resources()
    {
        gameSprites = new TextureAtlas(Gdx.files.internal("packed/game.atlas"));
        ground = gameSprites.findRegion("ground");
        wall = gameSprites.findRegion("wall");
    }

    public void dispose()
    {
        gameSprites.dispose();
    }
}

Before constructor declaration, we declare TextureAtlas named “gameSprites”– this is the thing that is going to store our spritesheet  with game characters and background.

dispose() function will be called after the end of our program, to unload all resources that have been used.

We put the initialization of the gameSprites into our constructor with the following line:

    gameSprites = new TextureAtlas(Gdx.files.internal("packed/game.atlas"));

This will take the generated atlas from ourproject/android/assets/packed/ folder. After that, declare two TextureRegion variables, ground and wall right after gameSprites atlas.

TextureAtlas gameSprites;

public TextureRegion ground;
public TextureRegion wall;


Great, now let’s assign some values in our constructor. It’s not hard: just add the following lines:

ground = gameSprites.findRegion("ground");
 wall = gameSprites.findRegion("wall");


The final result should look like this:

public class Resources {
 
     TextureAtlas gameSprites;
 
     public TextureRegion ground;
     public TextureRegion wall;
 
     public Resources()
     {
         gameSprites = new TextureAtlas(Gdx.files.internal("packed/game.atlas"));
         ground = gameSprites.findRegion("ground");
         wall = gameSprites.findRegion("wall");
     }
 
     public void dispose()
     {
         gameSprites.dispose();
     }
 }


Testing what we have

Now ground and wall point to the specific tiles and we’re be able to draw them! Now go to your main class file (in my case it’s DodgingHero.java) in core folder and add new public variable, Resources right at the start of the file. You should initialize it at the start of create() function. Remove the “img” variable and all code related to it from the file. You won’t need it anymore. Let’s just test if we can draw our simple tiles. In dispose function, add res.dispose(); Final result should look like this:

  
 public class DodgingHero extends ApplicationAdapter {
     public Resources res;
     SpriteBatch batch;
 
     @Override
     public void create () {
         res = new Resources();
         batch = new SpriteBatch();
     }
 
     @Override
     public void render () {
         Gdx.gl.glClearColor(1, 0, 0, 1);
         Gdx.gl.glClear(GL20.GL_COLOR_BUFFER_BIT);
         batch.begin();
         batch.end();
     }
 
     @Override
     public void dispose () {
         batch.dispose();
     }
 }

Now, for the sake of testing our tiles, let’s add simple drawing between batch.begin() and batch.end() inside our render() function:

@Override
 public void render () {
     Gdx.gl.glClearColor(1, 0, 0, 1);
     Gdx.gl.glClear(GL20.GL_COLOR_BUFFER_BIT);
     batch.begin();
     batch.draw(res.ground, 0, 0);
     batch.draw(res.wall, 0, 16);
     batch.end();
 }

This way we should draw the wall above the ground. The first parameter is the sprite that we want to draw, the next is the coordinates(x, y). Unless you change something, the x coordinates are going from left side of the screen to right side (0->width) and y is going from bottom to top (0->height). 0 means the lowest point of the window. Run the program and you should see both small tiles drawn at the left side of the screen:

gamescreen

Our work in progress!

Adjusting Code Structure

So, Vladimir, are we ready to build the game right here? Hell no. It might seem like a good idea to write all code here, but it will quickly become bloated if nothing is done: imagine that we have to program all the menus and screens in one file. The way I usually do it is to split every separate screen into a separate file and do the rendering/control checking there. The good news is that libgdx allows you to do this quite easily.

In our core/java/com.yourname.gamename package, create a new package called “screens.” There, we’ll add the DefaultScreen parent class, which will store the link to our game object (and will be able to access our resources from there), from which we’ll inherit the next screens.

newpkg

New Package Creation

Right click on the “screens”, package select “new” -> “Java Class.” Name it DefaultScreen, make it implement Screen (public class DefaultScreen implements Screen), add the necessary import from Libgdx by placing map cursor over “Screen” and pressing alt+enter. Press alt-enter again to automatically implement the missing methods. Don’t touch them. (for now). Now, we’ll do two things:

  • Declare a variable of our main class (it will point out to game)
  • Create a constructor for DefaultScreen

That should not take much time:

public class DefaultScreen implements Screen {
 
     public DodgingHero game;
 
     public DefaultScreen(DodgingHero _game)
     {
         game = _game;
     }


Very good, our DefaultScreen class is ready.

Now we should implement the actual game screen. Right click on screens package, add new Java Class, let’s name it GameScreen. GameScreen should extend the Default Screen. (public class GameScreen extends DefaultScreen). Press alt+enter to implement the default constructor. Your class should look like this:

public class GameScreen extends DefaultScreen {
     public GameScreen(DodgingHero _game) {
         super(_game);
     }
 }


Now go to your main class (in my case it’s DodgingHero), and blatantly cut-paste render() function from there to GameScreen. Change the input parameters to accept float delta (public void render (float delta)). We now have this:


public class GameScreen extends DefaultScreen {
     public GameScreen(DodgingHero _game) {
         super(_game);
     }
 
     @Override
     public void render (float delta) {
         Gdx.gl.glClearColor(1, 0, 0, 1);
         Gdx.gl.glClear(GL20.GL_COLOR_BUFFER_BIT);
         batch.begin();
         batch.draw(res.ground, 0, 0);
         batch.draw(res.wall, 0, 16);
         batch.end();
     }
 }

batch is unresolvable. We need to move it from main class here. Main class should be very small now:

 public class DodgingHero extends ApplicationAdapter {
     public Resources res;
 
     @Override
     public void create () {
         res = new Resources();
     }
 
     @Override
     public void dispose () {
         res.dispose();
     }
 }


The last thing to do is to change batch.draw calls. We don’t have res variable here, but we can access it via our game variable. Change batch.draw(res.ground, 0, 0); to batch.draw(game.res.ground, 0, 0); Do the same change with wall. The final GameScreen class should look like this:

public class GameScreen extends DefaultScreen {
 
     SpriteBatch batch;
 
     public GameScreen(DodgingHero _game) {
         super(_game);
         batch = new SpriteBatch();
     }
 
     @Override
     public void render (float delta) {
         Gdx.gl.glClearColor(1, 0, 0, 1);
         Gdx.gl.glClear(GL20.GL_COLOR_BUFFER_BIT);
         batch.begin();
         batch.draw(game.res.ground, 0, 0);
         batch.draw(game.res.wall, 0, 16);
         batch.end();
     }
 
     @Override
     public void dispose()
     {
         batch.dispose();
     }
 }

Run the game now. Oh no! What do we have in front of us? It’s a black screen! Something went wrong. No worries, the issue is that we moved the code to the separate screen, but did not instantiate it in any way. We need to tell our game to explicitly switch to it. Go back to our main class, and do two things:

  • Change class declaration: public class DodgingHero extends ApplicationAdapter { should change to public class DodgingHero extends Game {
  • At the end of create() function add the following line: setScreen(new GameScreen(this)); Press alt+enter to resolve and auto-import GameScreen class

Run the game now. You should see the red screen with two tiles at the bottom. It might not look as much, but our project has changed a lot. After this, we’ll be able to independently work on specific screens, and adding new screens (like main menu, credits, etc) won’t be a problem.


Git Commit: https://github.com/vladimirslav/dodginghero/commit/d02228f6ecb39fdbf98bb4ad54e57b5fb8f29b73

I’ve taken assets from: http://opengameart.org/content/tiny-16-basic, they are made by Lanea Zimmerman. I’ve cut separate tiles so it would be easier to follow (see my git repo).

You might want to check https://libgdx.badlogicgames.com/documentation.html for more details and in-depth descriptions.

Blades of the Righteous retrospective

It’s been almost 4 months since I’ve left the job to finish my game and potentially work on my other projects. I would not say that those 4 months felt like being in an avalanche. Rather, I felt like a small insignificant boat floating through the ocean. Not in a bad way. Except that maybe eventually the boat flips over because of the huge waves, the fisherman drowns and nobody can find him, while his wife is weeping back home and cursing the day he decided to go into an open sea and children become delinquents because they have no father figure which results in a dysfunctional family. Nevertheless, I think this is a good time to sum up some of my results and start writing them down.

It’s hard to focus on what I want to write. At one hand, I want to share my experiences. On the other hand, why should you care? So I am going try to write a small cycle of articles on how I planned, built and marketed my turn based strategy game, Blades of the Righteous. All of them are told from the programmer’s viewpoint and I’m hoping they will give some insights to those that are starting gamedev. I am not a huge fan of vague descriptions: “write to youtubers,” “split your code into smaller parts“ and “get lots of tasks so you won’t procrastinate” – those descriptions don’t usually say much to me. That’s why I don’t try to read self-help books anymore. When I write something, I’ll start with the general example and then describe how I did it.

Some background for the context: I am just an average dude. I’ve developed the game for about 2 years. Past 4 months – I quit my job to develop it full-time. It’s a turn-based strategy game, and has about 2500 activations on Steam (not much), about 90% of those were sold through the bundles (will cover it in separate article). I think this can be achieved by anyone if you work on it. But do you actually need something like that? It’s up to you to decide.

The game idea was born in early 2014. I was playing “Last Remnant” and thought that battle-system there was cool: although being turn-based, the game gave action feel and did not feel slow at all because lots was going on at the same time. So yes, iteration one: turn-based game with indirect ordering, units decide what they want to do on their own.

I’ve spent about 6 months of programming while working full-time and studying in the university. Spoiler alert: the result was as good as a broccoli pizza. Nevertheless, at that time I thought: “Cool, I’ve finished a game.” The same feeling that toddler experiences when he puts on his pants for the first time. The parents are excited, but nobody else cares.

Naturally, the game is done. “Gotta put it on greenlight then!” The first days were easy: you get lots of attention because Steam puts your game to the front page of Greenlight. I also got support from Latvian game developer association (shout out to gamedev.lv, thanks a lot!). Got about 200 ‘yes’ votes from that. After that, the votes were not coming, but I received an email from Groupees bundle. It gave me another 600 votes and the game was still hanging (as of Dec 2014). You get lots of comments: do not ignore them, users often know better. I wrote everything down and then tried to adjust it. The bundle turned out great, but there was still not enough votes. I put the game in that state on itch.io, sold it to one person, felt good “My first dollar, someone paid me!” (remember the toddler comparison). Thought “At least I tried.” Time to bury the dead game like you would bury the hatchet, so I wrote post-mortem (with greenlgiht statistics, in case you’re interested: http://vladimirslav.com/2014/12/blades-of-the-righteous-postmortem/ ). I successfully switched to my studies and was not doing any more game programming. That is, until the game passed the Greenlight in March 2015. Organically. I got ~300 votes just randomly. The game got greenlit with 1079 votes “for” and 1338 votes “against” (45:55 ratio).

Now here’s the catch and the main thing that I want you to understand from this article: if your game is good (or, rather, interesting to majority of the people), you’ll pass the greenlight by itself, I’d say in 2-3 months tops. The best games are much faster than this (2-3 weeks). The greenlight bundles definitely help, but if you don’t get any fans from the greenlight campaign – don’t expect your game to be received well (at least at first). But the fact that the game took 5 months to get greenlit and a special bundle promotion should have probably been my warning signal. But with the state of mind I had at that moment, I’d ignore it even if I saw a harp-playing angel who sang “drop your game m8” while staring directly into my eyes.

My current algorithm to game-development now if I want to make a game (and what you probably should do too unless you know what you’re doing) and get it to Steam:

  • Spend no more than 3 months on somewhat-polished prototype with minimal functions
  • Show it to my friends and make them play the game. Collect feedback.
  • Put the screenshots on twitter regularly, use #screenshotsaturday
  • If the game does not get enough traction on Steam and you see why (a lot of users will leave comments) – drop it.

The thing is, the greenlight decision motivated me to spend another year rewriting my game to (what I perceived) a decent level. I love my game and I love developing it, but it won’t be able to sustain me. If you have your game as a pet project – do whatever you want. If your well-being depend on it: do not ignore the signs. I’m going to describe the rework and second life of Blades of the Righteous, as well as what I think makes turn-based games great in my next article.

As a side note, I’ve put another game on Greenlight some time ago and got lots of those “game publishing proposals.” Not going to delve into that, but I think you must read this article (and never agree to those deals): http://morrisonlee.com/2016/05/23/game-publishers-in-2016-how-to-throw-your-lifes-work-away-in-seconds/

2d Fog of War with Sprites in Unity

When developing my casual roguelike, Wild West Pigeon, I’ve encountered a need to close parts of the map with fog of war. My game is turn-based, meaning I need to recalculate fog of war once every turn and not dynamically.

A lot of solutions recommend shaders, but I could not find any articles if I want other, albeit less prettier, solution (You might need this, for example, because not all Android phones prior to Android 4.0 support shaders – check this stack overflow reply). Therefore, I’ll try to share my knowledge on how I addressed the issue.

Fog of War Tile GameObject

  • There are lots of way to do fog of war sprite, but I made a simple black square (1×1). If you want your fog of war smoother and prettier – make a larger square with blurred sides.
  • Add it as an asset to your game project.
  • Create an empty object
  • Add a sprite renderer to it – set the sprite as your “Fog of War” sprite
  • Make a new sorting layer (call it “Fog of War” or something like that) – make it to be the last layer drawn (In my case, the order is following: Default -> Floor -> Floor_Destructibles -> Items -> Units -> Fog Of War) so that fog of war sprites would be drawn above all else.
  • Move the object to prefab.
  • Create an empty GameObject in your scene, name it “FOVPanel” or something like that, this will aggregate your ‘fog of war’ tiles.

Logics

What we need to do now – is to look at every player turn and check what tiles are revealed and need hiding. For this purpose – fog of war is regenerated after every move. Whenever new Fog of War tiles are created – their parent is assigned to FOVPanel object and on the next turn all of FOVPanel object’s current children are deleted and replaced by a newly-calculated and instantiated FOV tiles. Each game will be different, but in my game, when the level is generated, I have an array boolean revealedTiles[][] that takes the width and height of my map whenever new level is initialized.

I’ll try to describe the logics behind it – but I’ll show you my code as well in case you are interested.

  • You can attach your new script to “FOVPanel” object or whichever object you want, just make sure your player object will be able to access it. I’ve attacked it to my game manager (singleton static persistent object).
  • When level loads, mark all tiles in revealedTiles as false
  • Reveal some tiles around your player, i.e. make every tile around him visible (8 tiles around the player, 1 tile where player stands)
  • After player moves – call recalculation function, it makes sure that the tile the player moved to is set as true in revealedTiles, then calls the recursive calls to simple ‘raycasting’ function that checks which tiles are open (note – I call it ‘Raycasting’, not sure how it’s called ‘scientifically’ – I just imagine that we are sending rays of light towards direction where player looks)
  • The raycasting function goes forward, checks every tile row and sees if that’s an obstacle. If that’s an obstacle – reveal the tile, but don’t go forward. If there’s no obstacle – reveal the tile and go to next row.
  • The ray expands gradually: i.e. at first we reveal one tile in front of our hero, on the next tile column we reveal up to 3 tiles, on the next tile column we reveal up to 5 tiles, etc.
  • At first – imagine the simple ray that goes forward – you just reveal all tiles in front of it until you encounter an obstacle.
  • After that – try to improve it by making a corner-case (pun intended) so that leftmost and rightmost revealed tile would go deeper one level and make sure that the next column is revealed a bit more. See image below. The hero (‘H’) expands his view depending on the distance of the tiles.
Raycasting Example

Raycasting Example

Full Fog of War module code here:

using UnityEngine;
using System.Collections;
using System.Collections.Generic;

public class FOV : MonoBehaviour {

    [HideInInspector] public GameObject fovPanel;
    public GameObject fovTile; //That's your previously created Fog of War tile - assign in editor!

    void Awake()
    {
        fovPanel = GameObject.Find("FOVPanel");
    }

    // max revealed tile depth (from start)
    public const int MAX_RANGE = 5;

    /*
     level - how far we've already gone with our raycasting
     x - current tile x position
     y - current tile y position
     directionX - make sure it's -1, 0 or 1 (0 if directionY is not 0)
     directionY - make sure it's -1, 0 or 1 (0 if directionX is not 0)
    */
    public void RayCasting(int level,
                           int x,
                           int y,
                           int directionX,
                           int directionY,
                           bool leftCorner,
                           bool rightCorner)
    {
        // that's the board script: it handles all the board logics
        BoardManager board = GameManager.instance.boardScript;
        // continue only if we have not surpassed the max distance
        if (level < MAX_RANGE)
        {
            // if we are out of bounds
            if (x < 0 || y < 0 || x >= board.maxX || y >= board.maxY)
            {
                return;
            }
            else
            {
                // ok, we're here, mark the tile as revealed
                board.revealedGrid[x, y] = true;
                // but does the tile blocks visibility? if visibilityGrid[x, y] is true, then player can see through the tile
                // what's behind it
                if (board.visibilityGrid[x, y])
                {
                    // our ray expands gradually. therefore if we are located on the corner tiles
                    // of the current ray level - we need to expand further on the next level
                    if (leftCorner)
                    {
                        if (directionX != 0)
                        {
                            // if we are moving horizontally, expand ray below or above (that's why we adjust y by directionX)
                            // the left corner tile ray would go something like that
                            // level
                            // 0 1 2
                            // . . *
                            // . * *
                            // * * .
                            RayCasting(level + 1, x + directionX, y + directionX, directionX, directionY, leftCorner, false);
                        }
                        else
                        {
                            // else
                            RayCasting(level + 1, x + directionY, y + directionY, directionX, directionY, leftCorner, false);
                        }
                    }
                    
                    // same as with left corner
                    if (rightCorner)
                    {
                        if (directionX != 0)
                        {
                            RayCasting(level + 1, x + directionX, y - directionX, directionX, directionY, rightCorner, false);
                        }
                        else
                        {
                            RayCasting(level + 1, x - directionY, y + directionY, directionX, directionY, rightCorner, false);
                        }
                    }

                    // we raycast forward in any case
                    // level
                    // 0 1 2
                    // . . .
                    // * * *
                    // . . .
                    RayCasting(level + 1, x + directionX, y + directionY, directionX, directionY, leftCorner, false);
                }
            }
        }
        else
        {
            return;
        }
    }

    public void Recalculate(int x, int y) {
        BoardManager board = GameManager.instance.boardScript;
        // the player moves here
        board.revealedGrid[x, y] = true;

        // raycast to all directions
        RayCasting(0, x, y, 0, 1, true, true);
        RayCasting(0, x, y, 0, -1, true, true);
        RayCasting(0, x, y, 1, 0, true, true);
        RayCasting(0, x, y, -1, 0, true, true);
    }


    protected const int MAX_X_LOOKUP = 20;
    protected const int MAX_Y_LOOKUP = 10;

    // redraw based on position of camera 
    // (currentX and currentY most often is the center of the screen, where player stands)
    public void Redraw(int currentX, int currentY)
    {
        // redraw the Fog of War tiles
        List<GameObject> children = new List<GameObject>();
        // first we gather all children of FOVPanel
        foreach (Transform child in fovPanel.transform)
        {
            children.Add(child.gameObject);
        }

        // then we delete them
        foreach (GameObject child in children)
        {
            Destroy(child);
        }

        BoardManager board = GameManager.instance.boardScript;

        // then we draw new Fog of War tiles
        for (int x = -MAX_X_LOOKUP + currentX; x < MAX_X_LOOKUP + currentX + 1; x++)
        {
            for (int y = -MAX_Y_LOOKUP + currentY; y < MAX_Y_LOOKUP + currentY; y++)
            {
                if (x < 0 || y < 0 || x > board.maxX - 1 || y > board.maxY - 1)
                {
                    continue;
                }


                if (board.revealedGrid[x, y] == false)
                {
                    Vector3 pos = new Vector2(x, y);
                    GameObject obj = Instantiate(fovTile, pos, Quaternion.identity) as GameObject;
                    obj.transform.parent = fovPanel.transform;
                }
            }
        }
    }
}

Let me know if you see any mistakes or know how to do it better! If you want to see how the final result works, you can check out my game on Google Play market: Wild West Pigeon.

Memory Management in TCP Chat Server using libuv

I’ve recently had a task to build a single-threaded tcp chat server and client based on an event loop (using non-blocking asynchronous approach). While this seemed like a time-consuming task to me at first, there are already some solutions that can make your life much easier.

For technology stack I’ve decided to use libuv for async event loop and networking – http://libuv.org/
You can find the final source code here: https://github.com/vladimirslav/libuv-chat, in this post I’ll go through the crucial parts (i.e. the parts where I actually got stuck). For the good examples of libuv you can look up https://nikhilm.github.io/uvbook/ – but it does not offer good advice on memory management (at least yet, at the moment of writing this post).
Unsurprisingly, the server turned out to be a biggest struggle, the memory management part being most problematic. Since the language of choice is C++, the memory management is important: i am using RAII principle for resource management. We are going to make a singleton class ‘ChatServer’.

To Initialize the Server

 The whole event system is based on a loop (warning: not safe for multi-threads), so we initialize the loop first. The server socket is in fact a stream – it is used to send/receive events. Variables ‘loop’ and ‘server’ are parts of ChatServer class.
    uv_loop_init(&loop);
    // then, we initialize tcp server socket
    uv_tcp_init(&loop, &server);

    // "0.0.0.0" means that we listen on all available interfaces and not binding ip
    // to a specific address
    sockaddr_in addr;
    uv_ip4_addr("0.0.0.0", port, &addr);
    uv_tcp_bind(&server, (const struct sockaddr*)&addr, 0);

    // start listening: server is the socket stream,
    // DEFAULT_BACKLOG is int with max queued connections
    // the third parameter is a callback that is called when new client connects
    int err = uv_listen((uv_stream_t*) &server, 
                        DEFAULT_BACKLOG, 
                        [](uv_stream_t* server, int status)
                        {
                            ChatServer::GetInstance()->OnNewConnection(server, status);
                        });

On New Connection

When new connection is incoming, we need to decide what to do with it. I have a special object “ChatSession” that handles this stuff, but if I try to give most relevant things:
        ChatSession newSession; 
        // connection is also a stream - it is used to exchange data/events between
        // client and server
        newSession.connection = std::make_shared();
         
        // let's init our connection stream to start receiving/sending data
        uv_tcp_init(&loop, newSession.connection.get());
    
        if (uv_accept(server, (uv_stream_t*)newSession.connection.get()) == 0)
        {
            // set up read callbacks
            uv_read_start((uv_stream_t*)newSession.connection.get(),
                          alloc_buffer, 
                          [](uv_stream_t* stream, ssize_t nread, const uv_buf_t* buf)
            {
                ChatServer::GetInstance()->OnMsgRecv(stream, nread, buf);
            }); 

            // do post-processing, a good idea would be to add a new session
            // to the list of some sort
        } 
        else
        {
            // error handling: forcefully close the connection stream
            uv_read_stop((uv_stream_t*)newSession.connection.get());
        }
    }
    else
    {
        // error handling
    }

Memory Management when writing to stream

Note that std::bind won’t work for setting callbacks, thus we need this small hack with lambdas. libuv itself is written in C so it won’t allow to use class methods as callbacks that simply. Now, the read is pretty much straight-forward, but I had the most problems with write callback. After we read the message and trying to send it further, we need to make a new request structure.

    uv_write(req,
             connection,
             message->GetBuf(),
             1,
             [] (uv_write_t* req, int status)
             {
                 ChatServer::GetInstance()->OnMsgSent(req, status);
             });

Where “req” is message write request struct (uv_write_t), unique to every message that is currently being sent. The whole challenge is that req should be kept even after OnMsgSend is done. We’d need some kind of Memory Pool for that. Solved it like this:

class ReqPool
{
public:
    ReqPool();
    uv_write_t* GetNew();
    void Release();
protected:
    std::queue<std::unique_ptr>unused;
    std::queue<std::unique_ptr>used;
};

ReqPool::ReqPool()
{
}

uv_write_t* ReqPool::GetNew()
{
    if (unused.empty())
    {
        used.push(std::move(std::unique_ptr(new uv_write_t)));
    }
    else
    {
        used.push(std::move(std::unique_ptr(unused.front().release())));
        unused.pop();
    }

    return used.back().get();   
}

void ReqPool::Release()
{
    unused.push(std::move(std::unique_ptr(used.front().release())));
    used.pop();
}

Whenever we are going to send a new request, we get a new uv_write_t structure from the memory pool (either unused one, of if all are already assigned – create a new one.

    uv_write_t* req = msg_queue.requests.GetNew();

After the program stops running – all the structures are going to be deleted by themselves. You can check the full code here: https://github.com/vladimirslav/libuv-chat

Blades of the Righteous Remaster

Since I got approved @ Greenlight publishing, I’ve been working on my game most of my spare time.

Right now, the new features will be:

  • Getting rid of line-by-line combat system – the tiles are going to be introduced
  • One global screen with permanent upgrades – then switch to levels on maps which will have separate resources / units that are not going to be transferred through levels
  • Castle screen, just because I think it’s pretty cool (work in progress, obviously 🙂

Castle view screen